Apophysis Process Note
Apophysis Tutorial は、ネット上に数多くあるようですが、そのTutorialを
Editor で、この手順通りに編集すれば、図のような画像が得られます。
使わせてもらって、初心者向けの画像作成用手順書を作ってみました。
Apophysis Version 7X 15D を使います。
(そういう私も初心者ですが)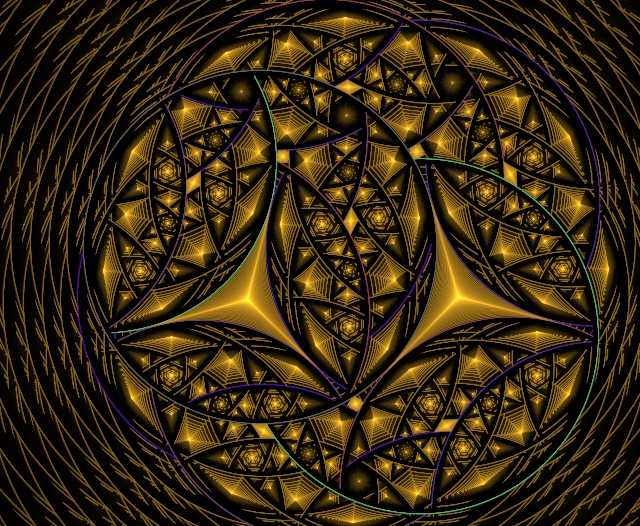
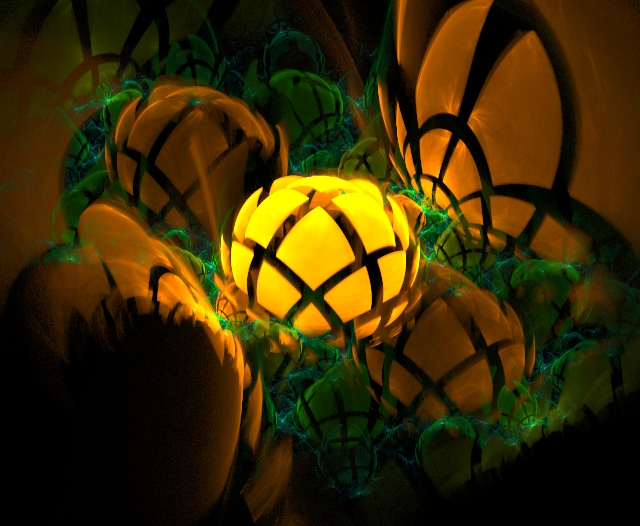
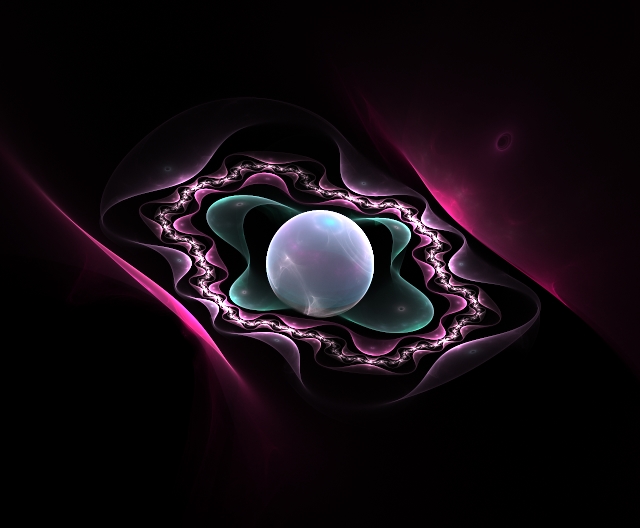
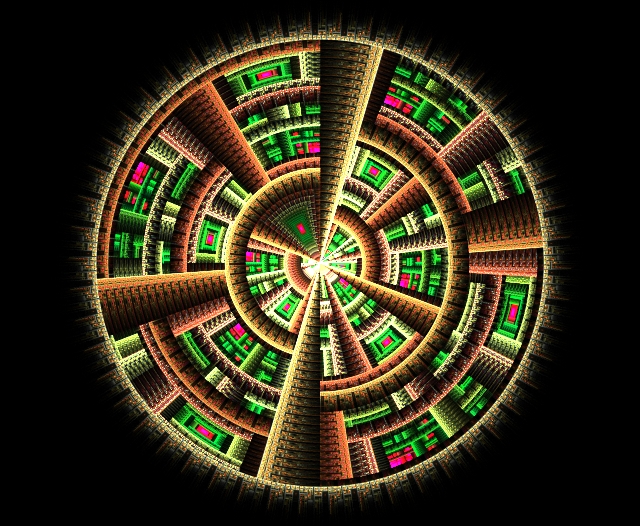
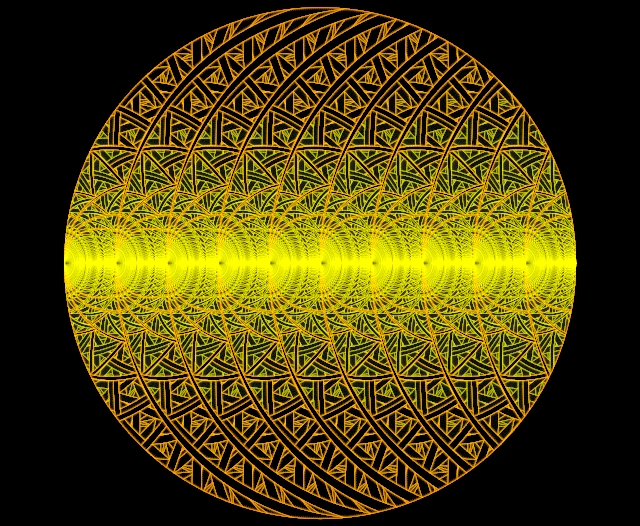
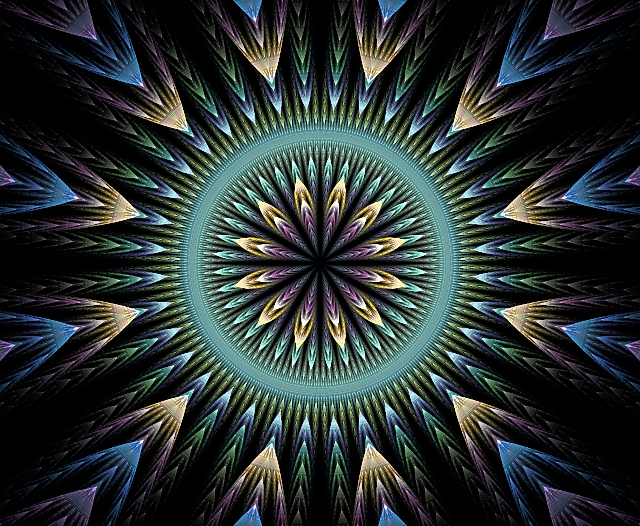
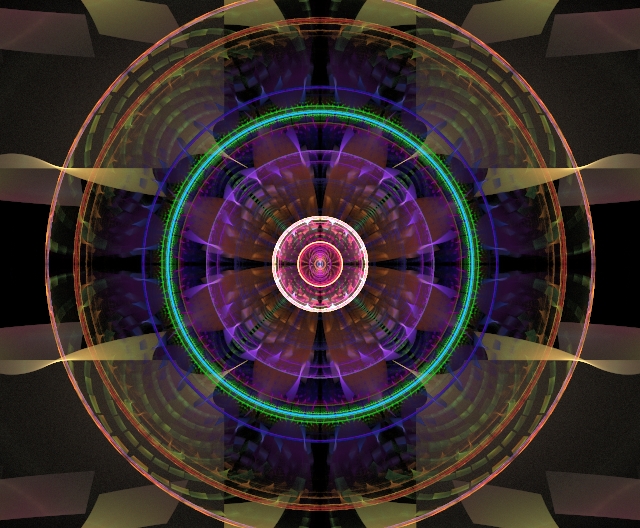
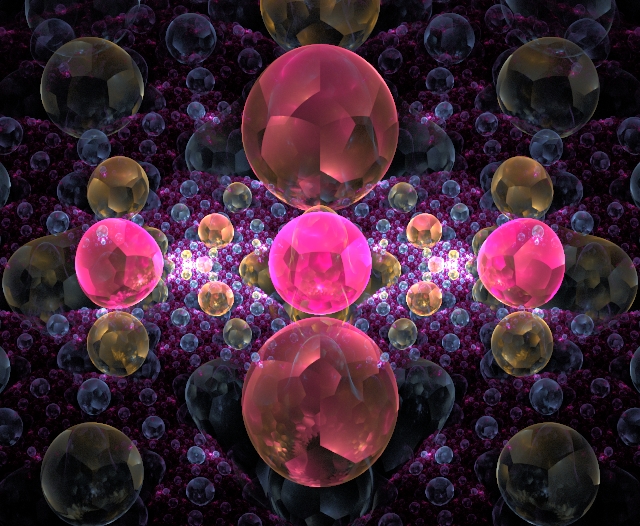
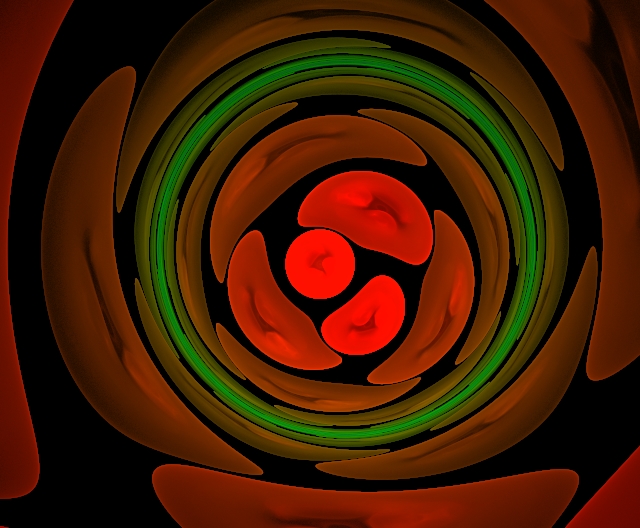
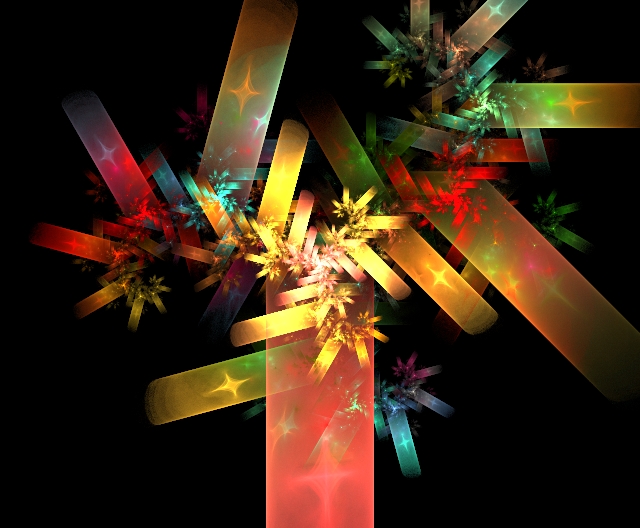
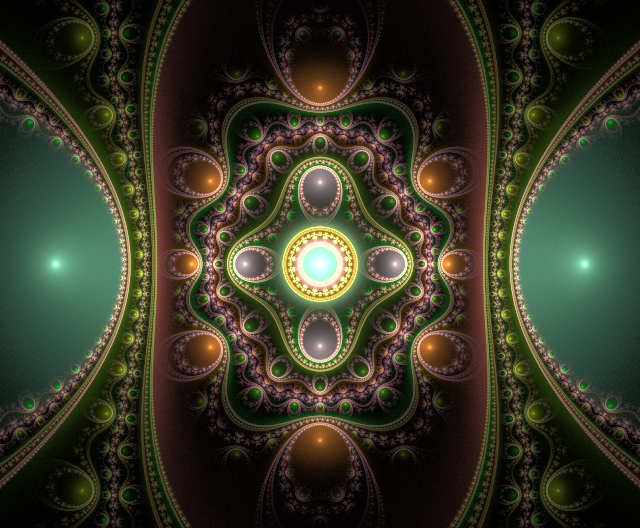
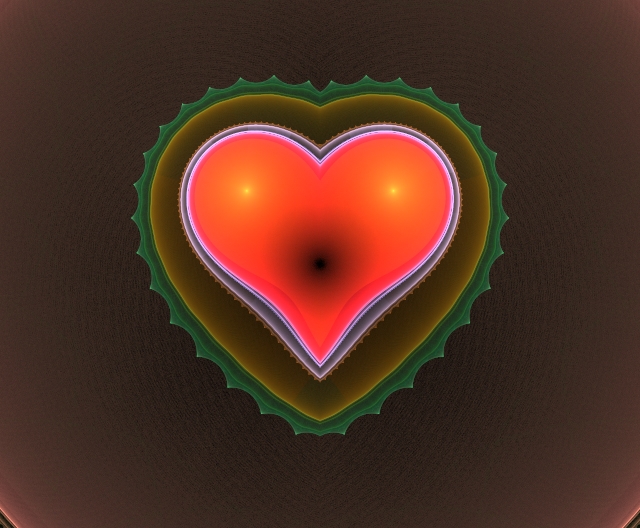
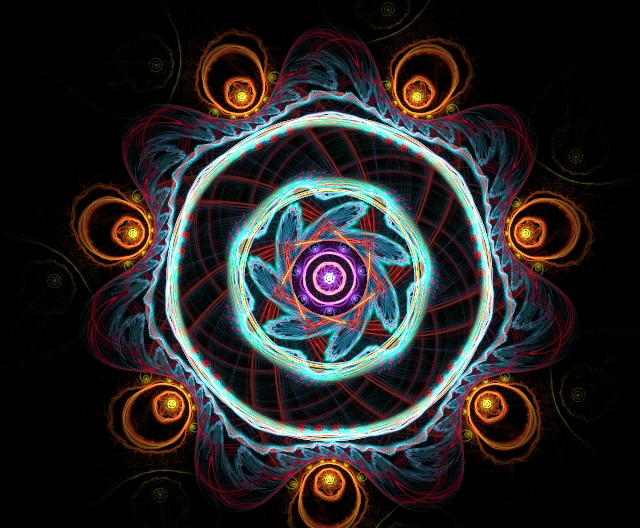
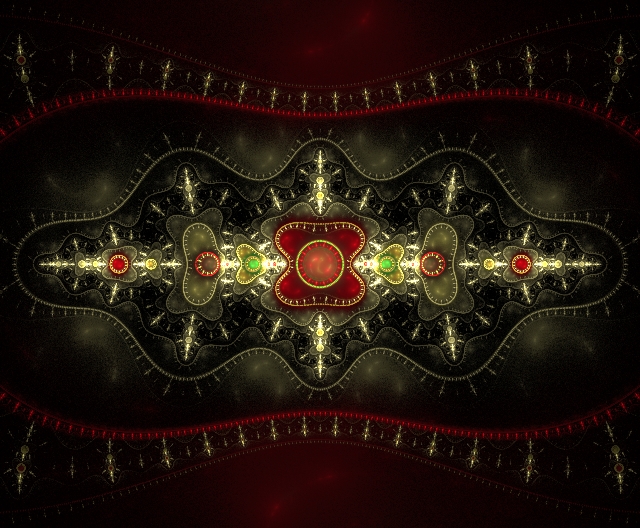
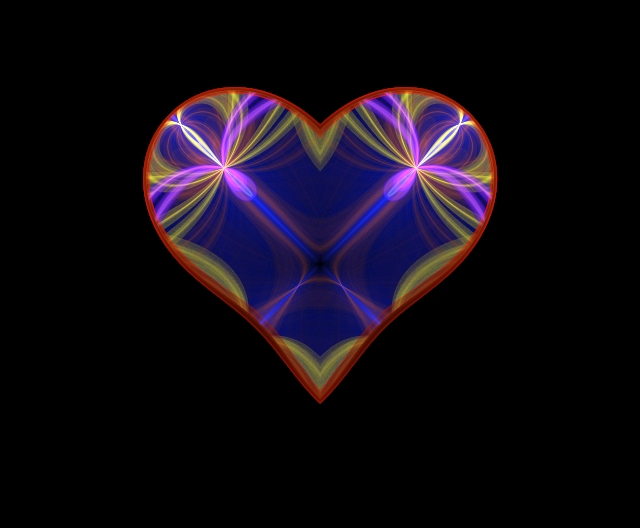
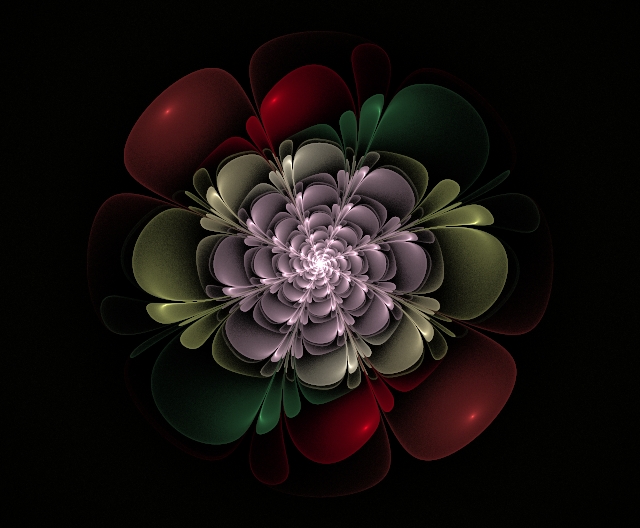
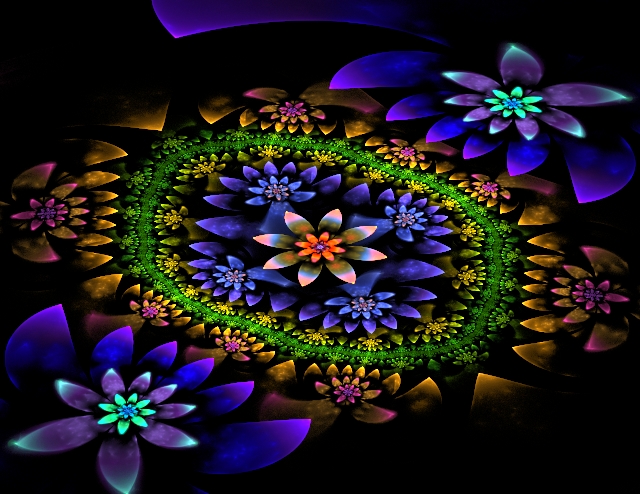
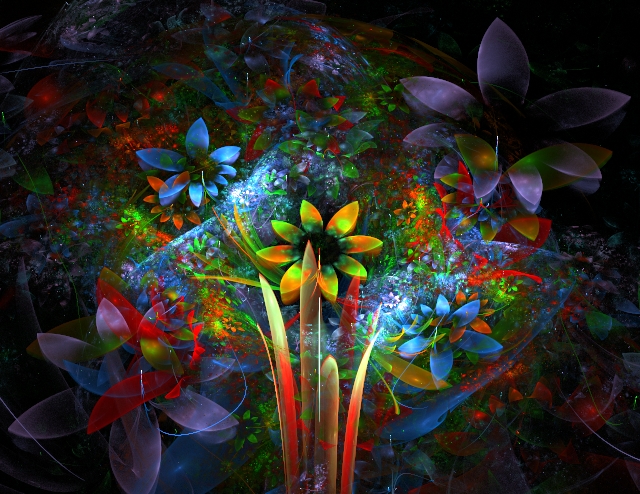
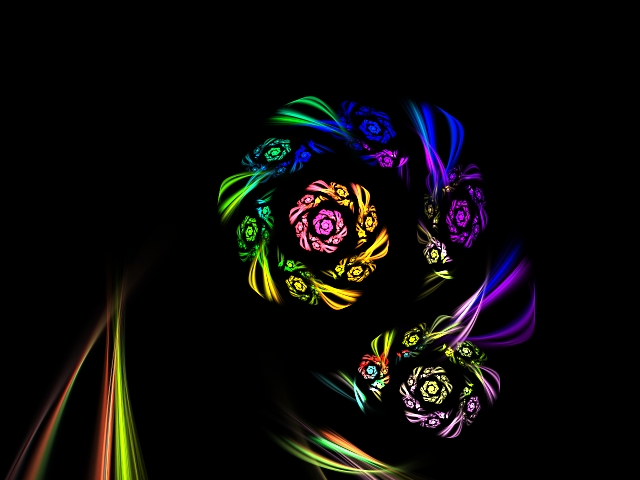
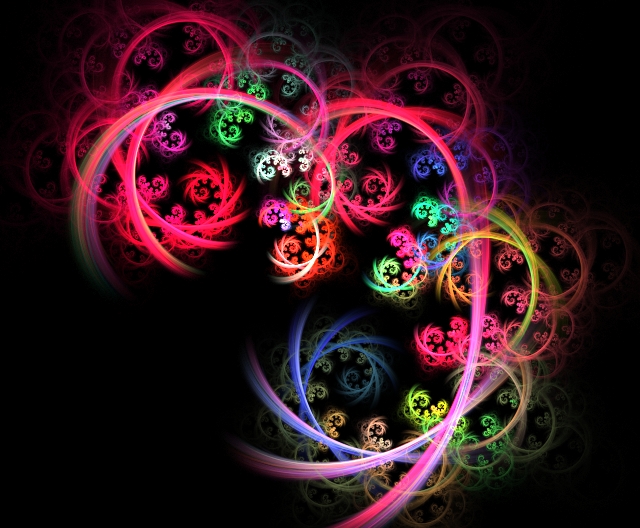
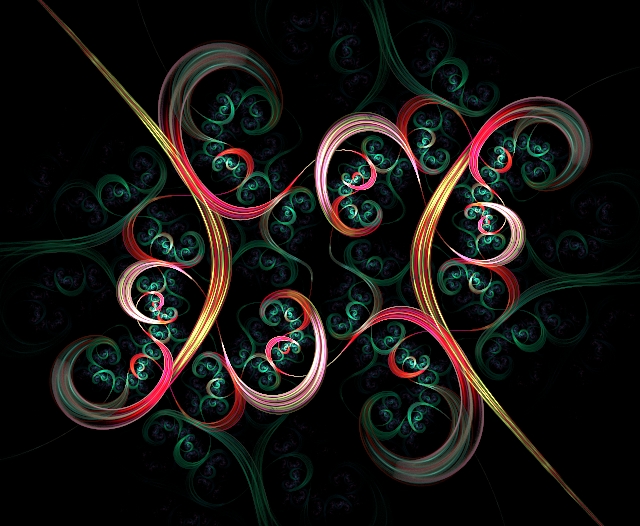
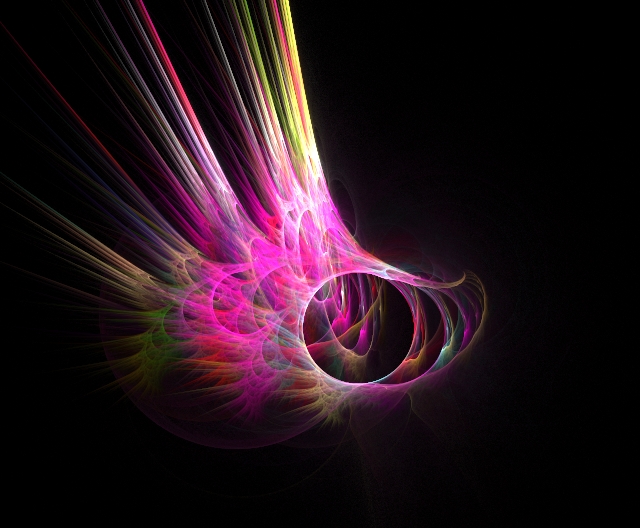
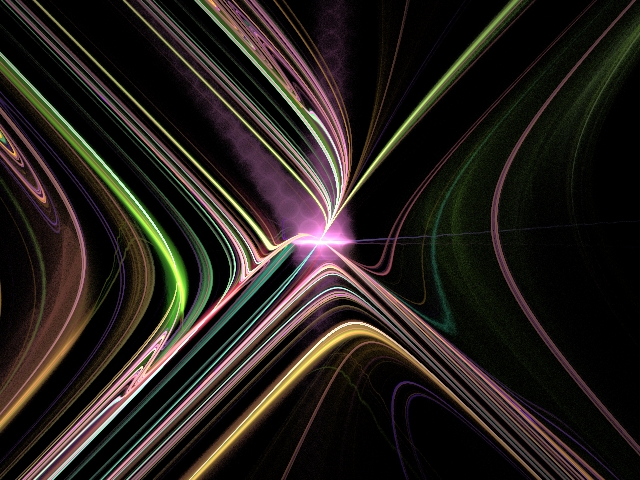
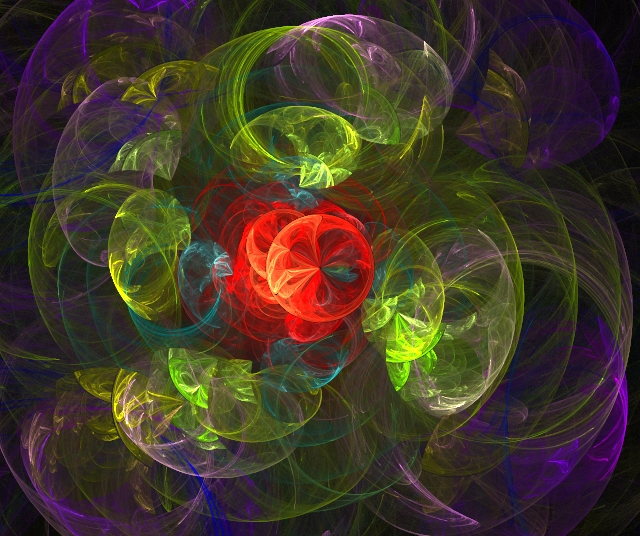
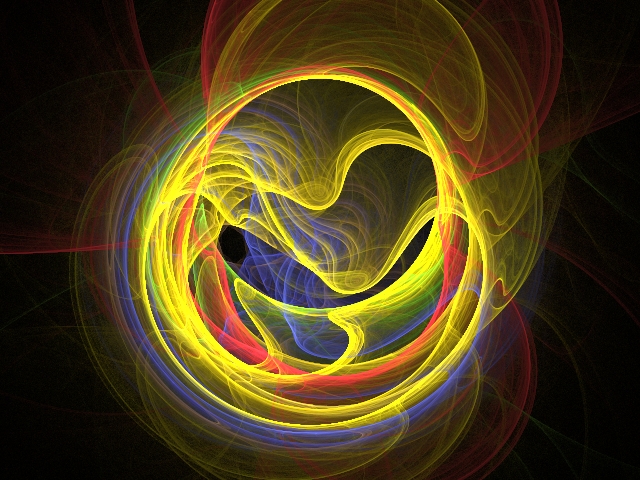
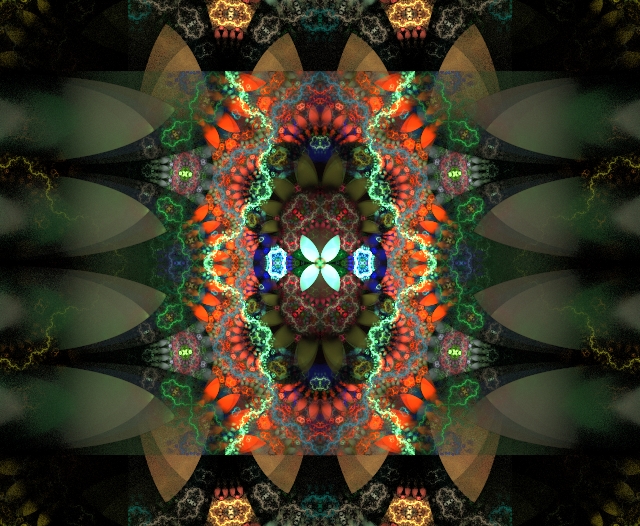
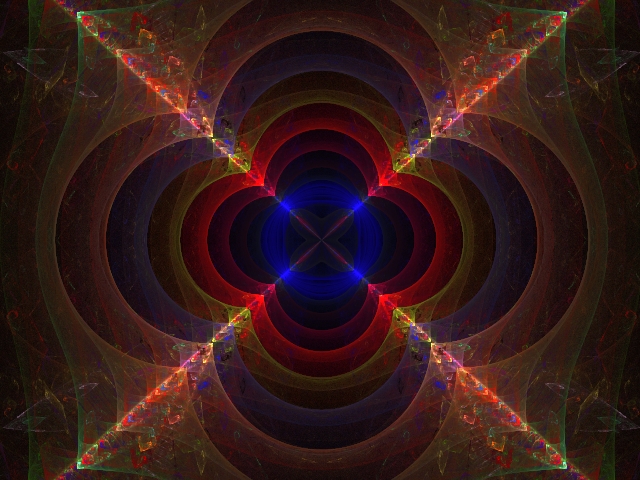
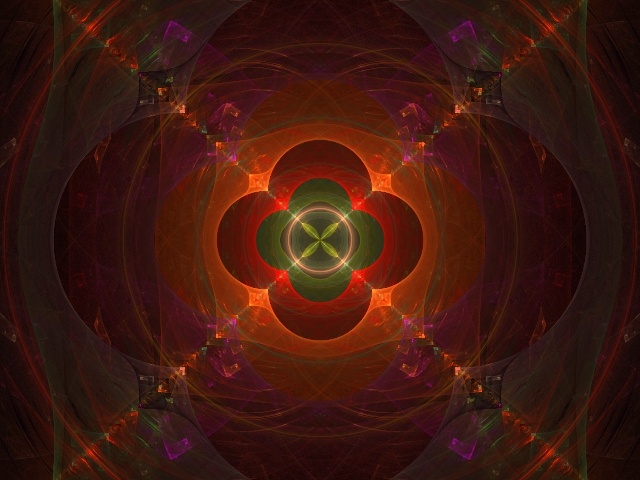
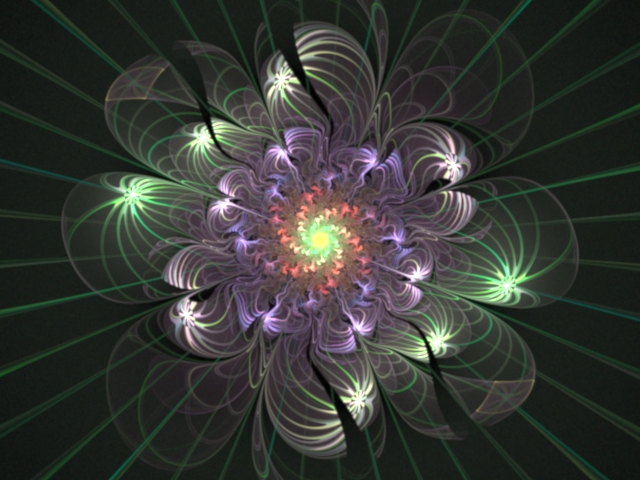
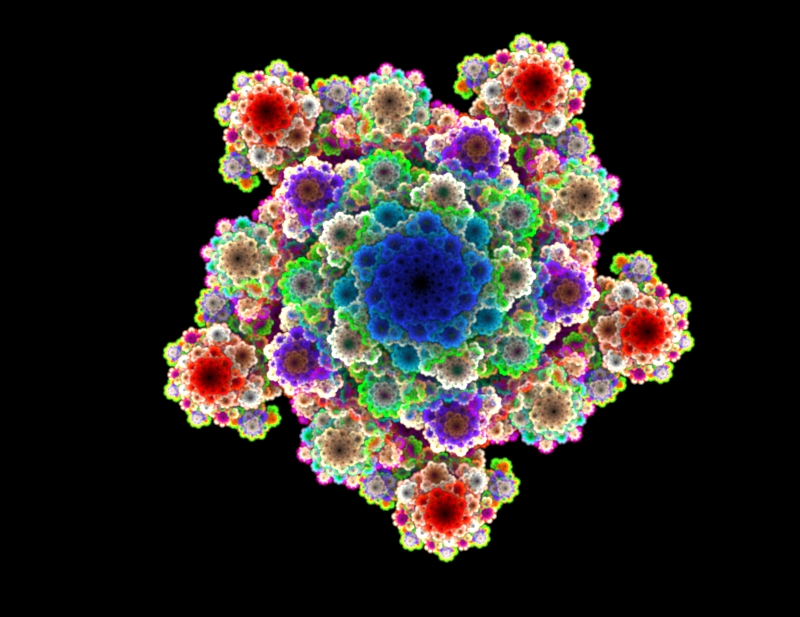
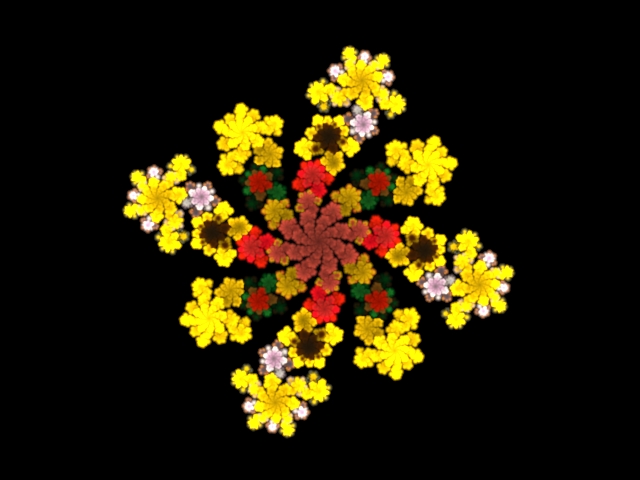
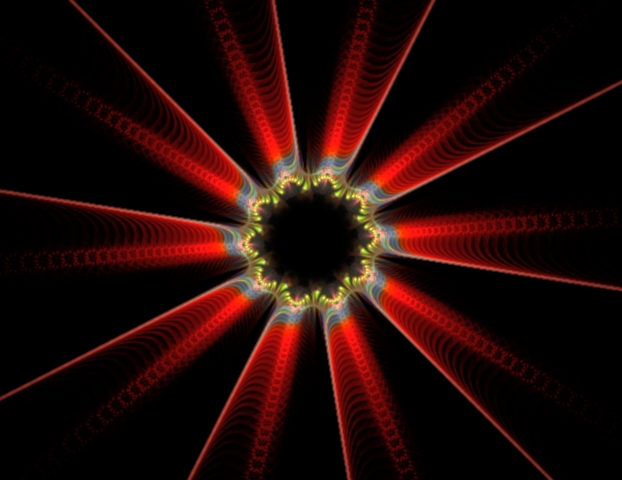
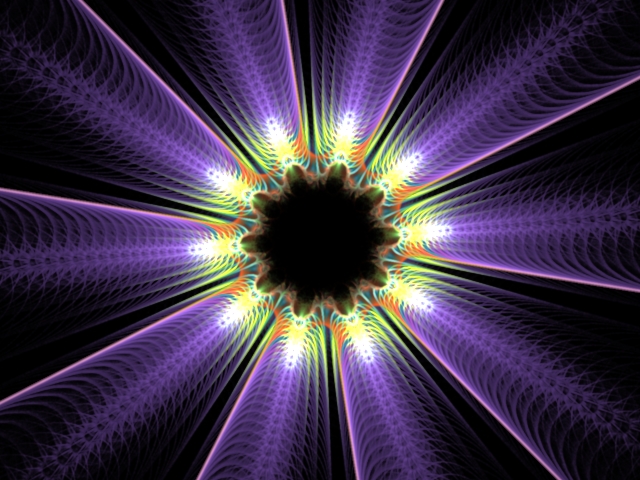
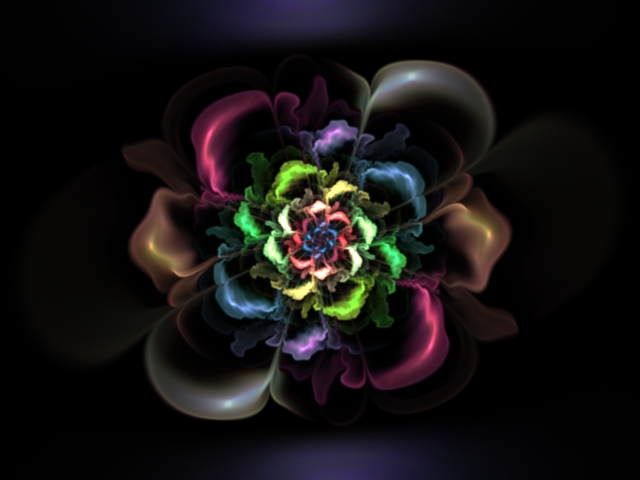
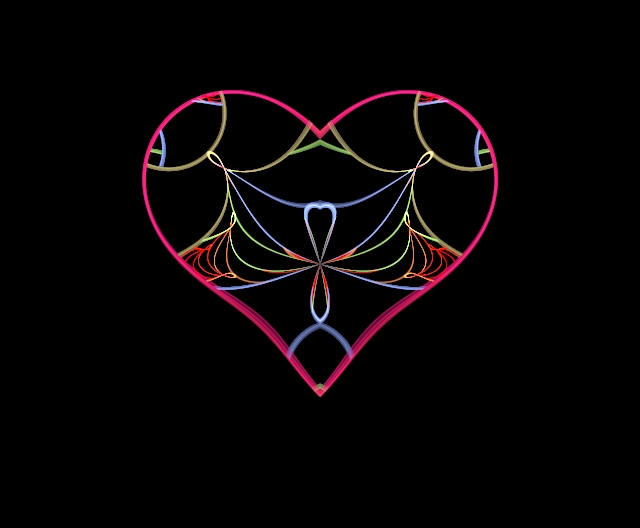
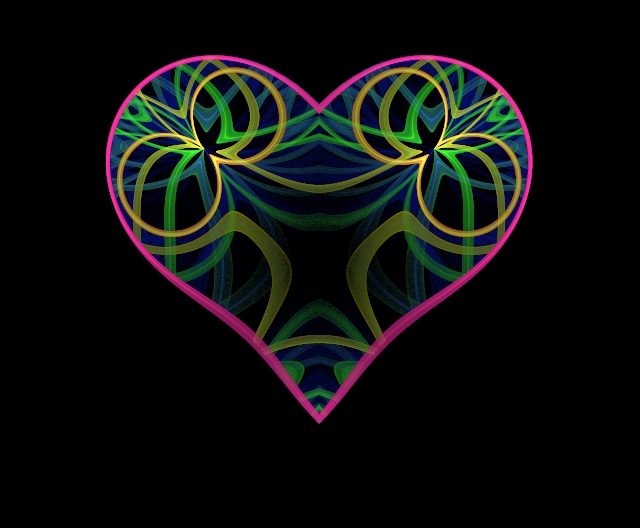
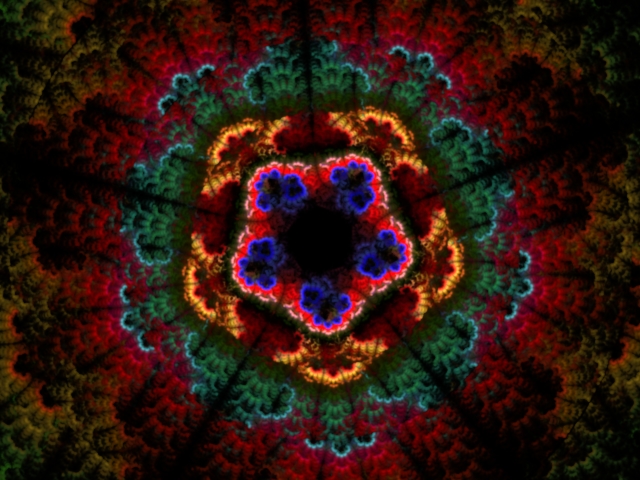
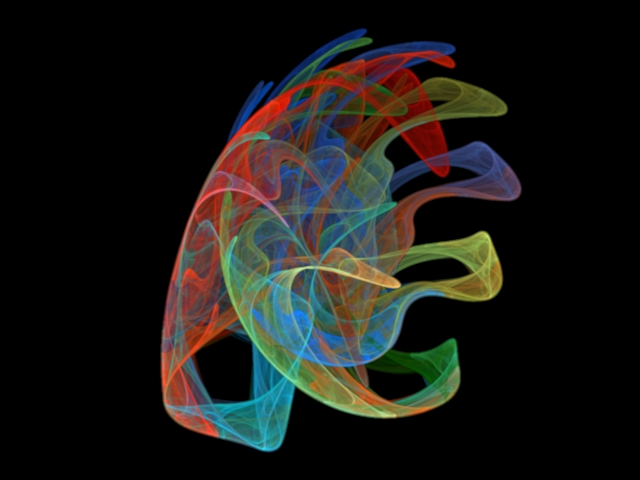
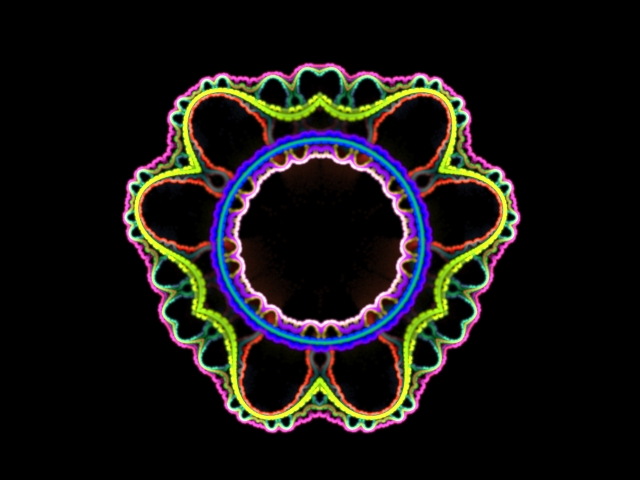
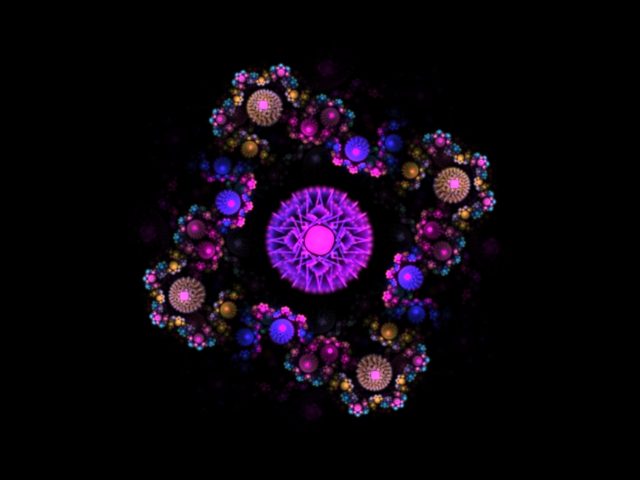


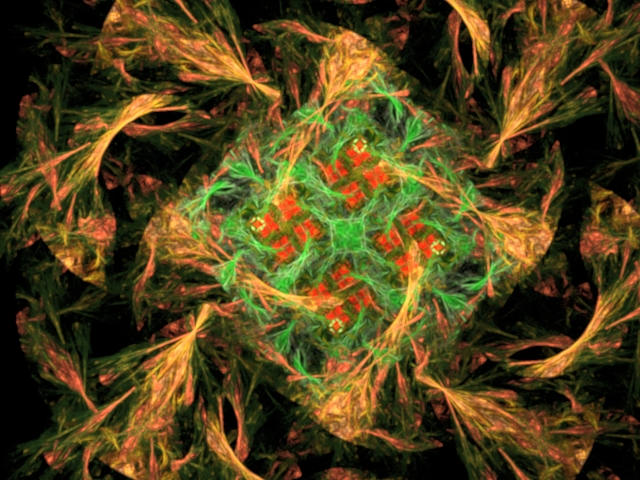
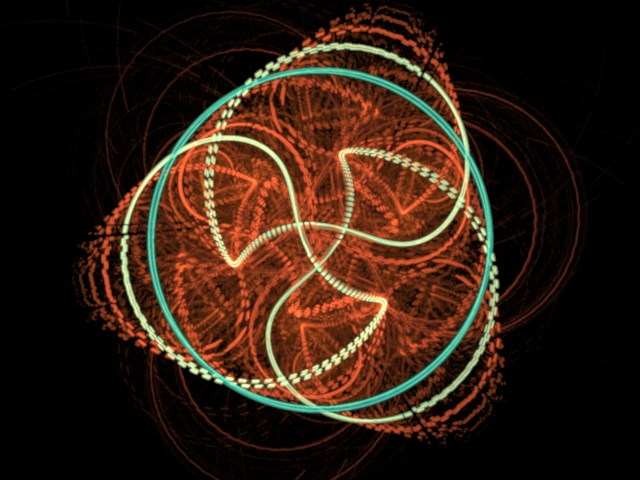
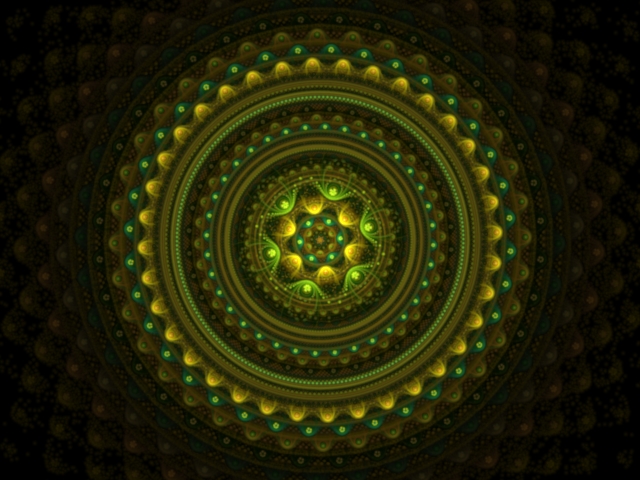
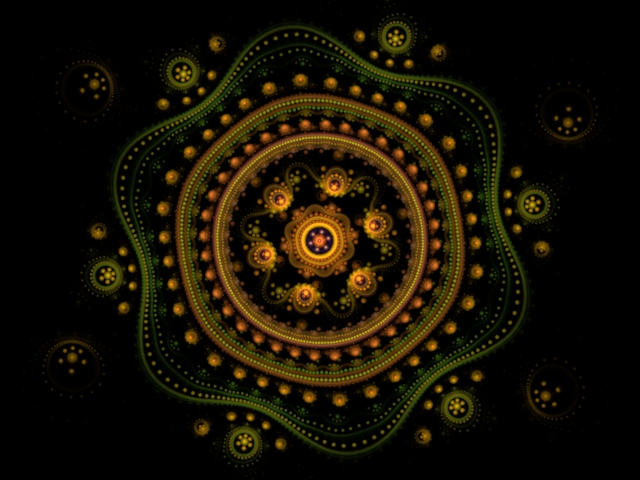
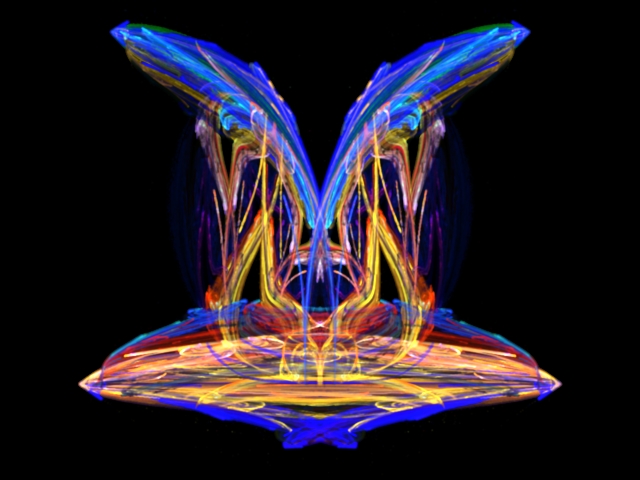
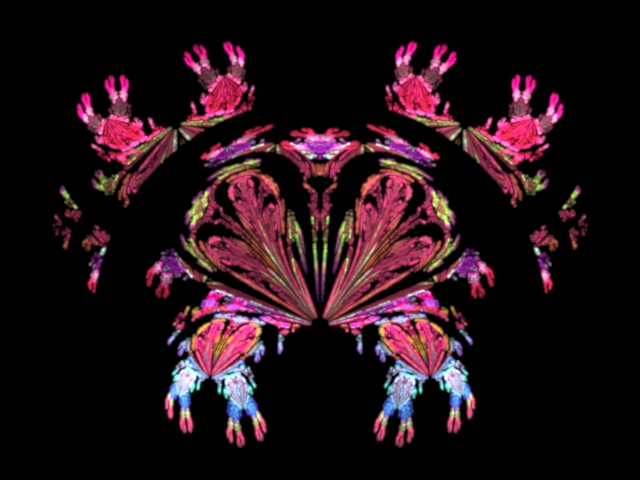
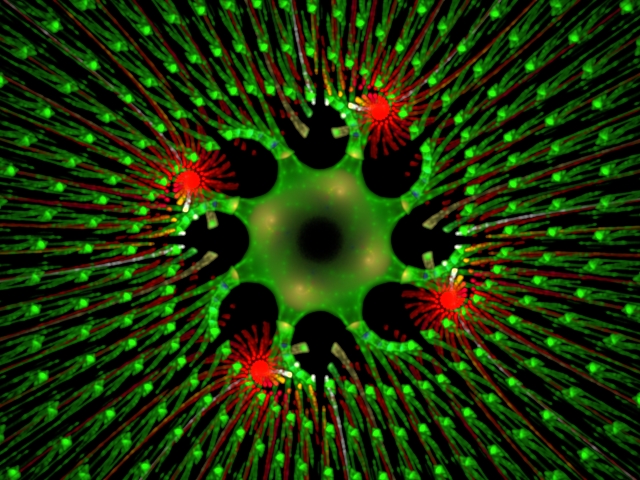
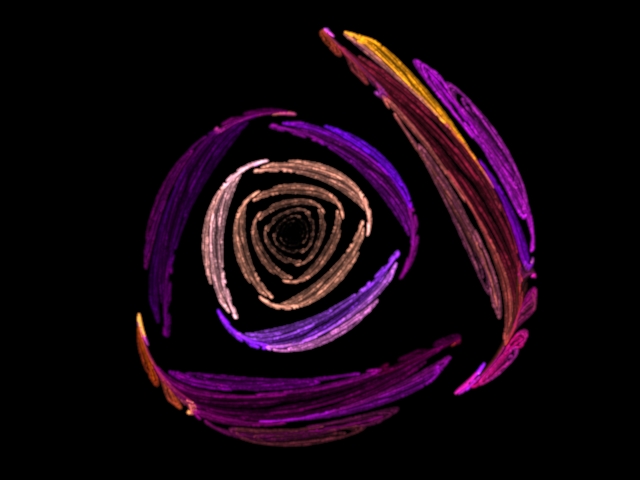
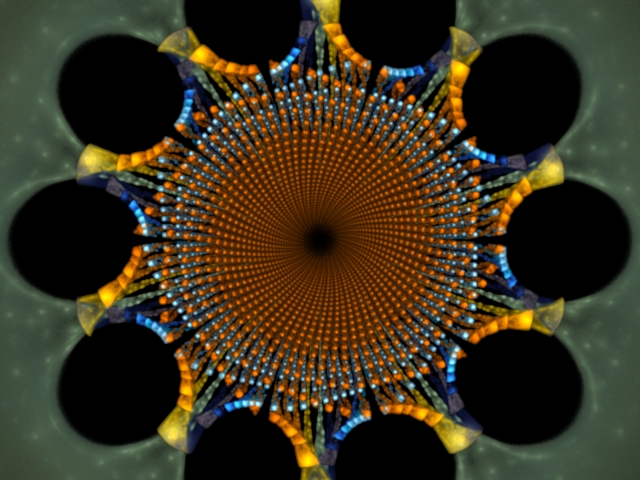
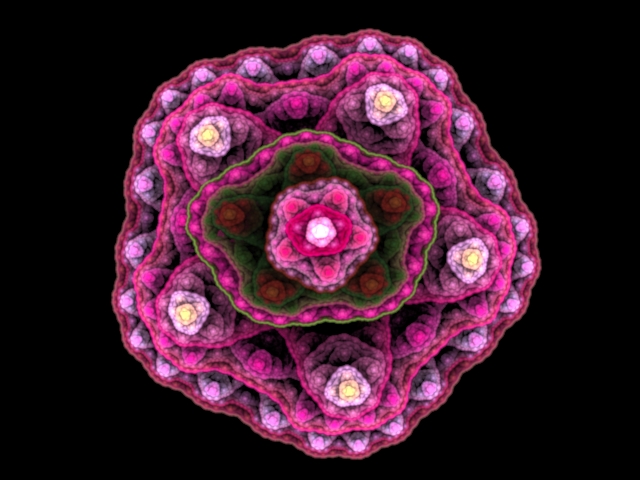
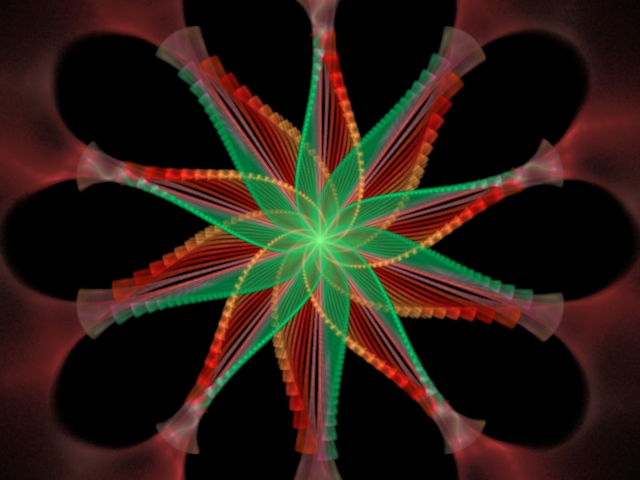
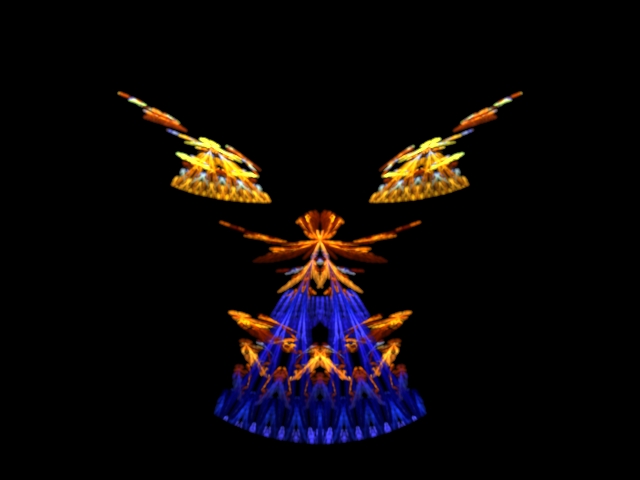
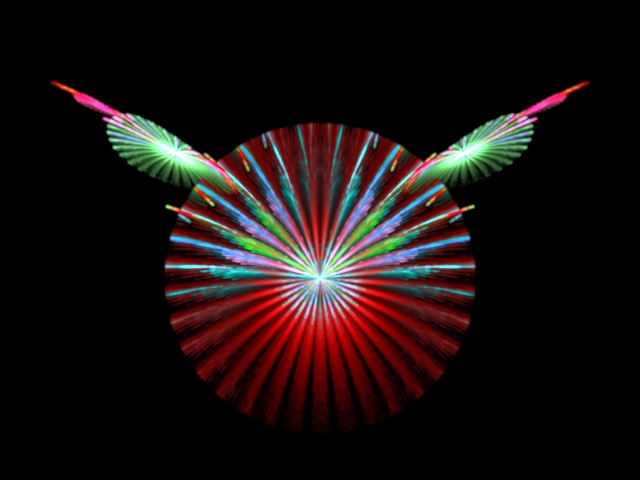
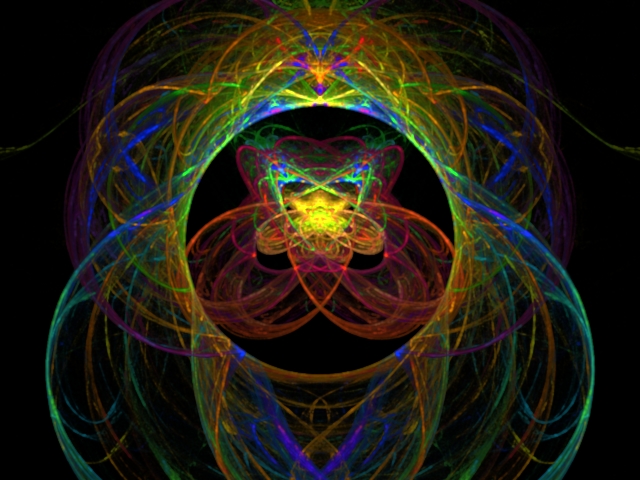
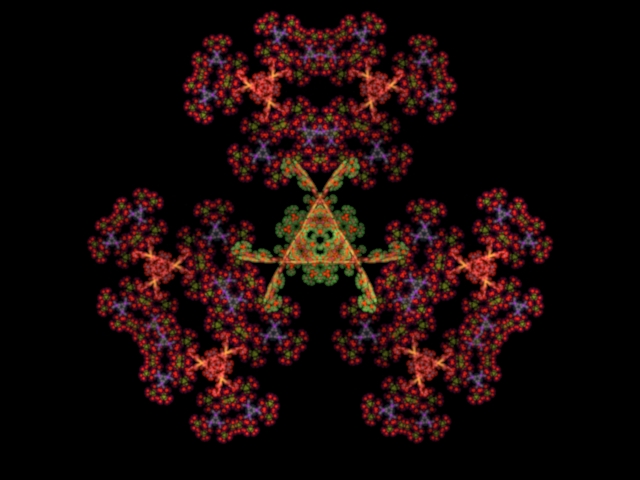
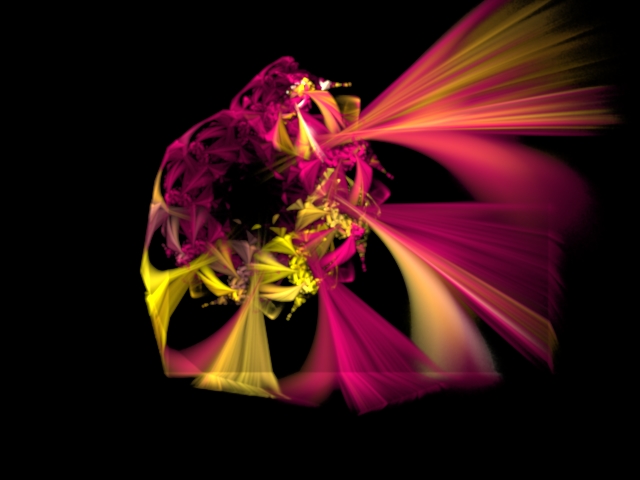
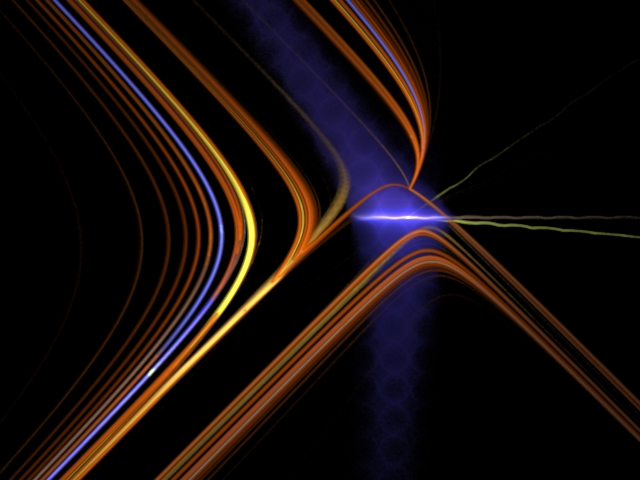
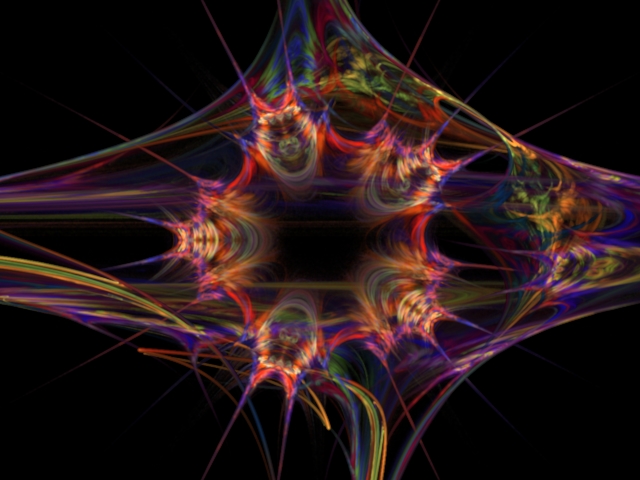
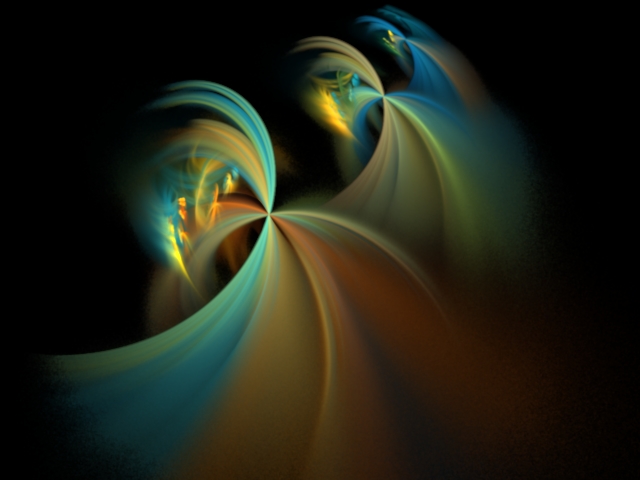
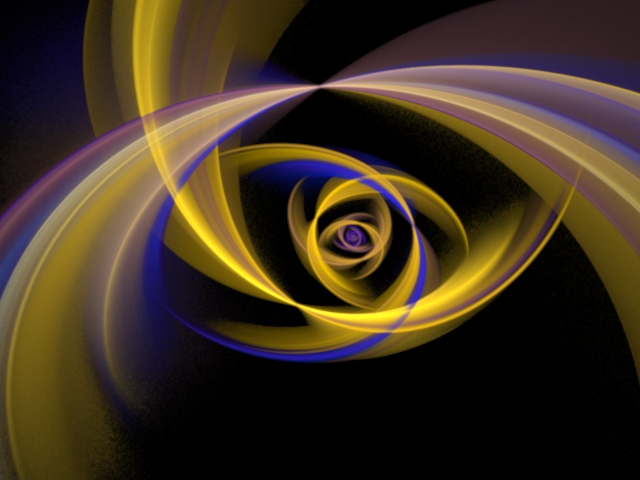
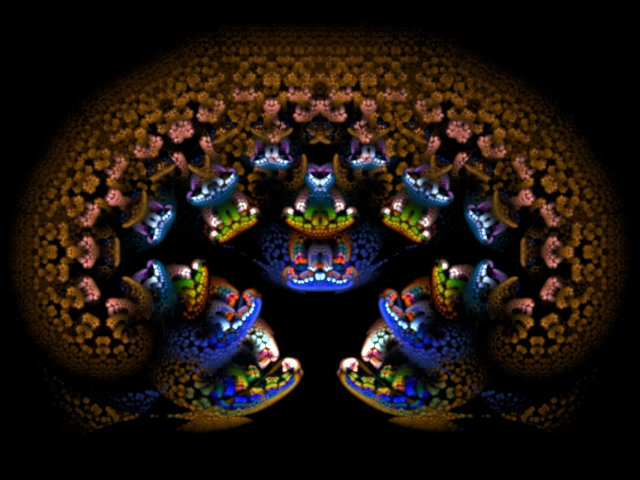
画像をクリックすれば、その画像の手順書のところにジャンプします。
遊び方
Editor window (fx)で。
Editor window で。
Editor window で。
Editor window で。
Editor window で。
Editor window で。
Editor window で。
Editor window で。
Editor window で。
Editor window で。
Editor window で。
Editor window で。
Editor window で。
Editor window で。
Editor window で。
Editor window で。
Editor window で。
Editor window で。
Editor window で。
Editor window で。
Editor window で。
Editor window で。
Editor window で。
Editor window で。
Editor window で。
Editor window で。
Editor window で。
Editor window で。
Editor window で。
Editor window で。
Editor window で。:
Editor window で。:
Editor window で。
Editor window で。
Editor window で。
Editor window で。
Editor window で。
Editor window で。
Editor window で。
Editor window で。
Editor window で。
Editor window で。
Editor window で。
Editor window で。
Editor window で。
Editor window で。
Editor window で。
Editor window で。
Editor window で。
Editor window で。
Editor window で。
Editor window で。
Editor window で。
Editor window で。
Editor window で。
Editor window で。
Editor window で。
Editor window で。
Editor window で。
Editor window で。
Editor window で。
Editor window で。
Editor window で。
Editor window で。
Editor window で。
Editor window で。
Editor window で。
Editor window で。
Editor window で。
Editor window で。
Editor window で。
画像が作成出来たら、
*editer window のcolorsタグ内のTransform colorの値や、
color speedの値を変えてみる。
*Adjustment windowの中のGradientタグで色番号を変えてみる。
*editorで、各Transformの位置や大きさや角度などを変えてみる。
*editorで、各TransformのVariationsの種類や値を変えてみる。
*editorで、Transformを削除したり、追加(適当なVariationsで)したりしてみる。
これらを根気よくやると、また違う印象の画像が得られます。
参照した Tutorial は
こちら です。
New flame T1:Weight=200;
Variations tab:linear=0.015;lazysusan=0.99;
Variables tab:lazysusan_spin=3.14159;他は 0 ;
Triangle tab:0.25 下へ移動、1.0 右へ移動。150°反時計回りに回転。
New transform T2:
Variations tab:linear=0;julian=0.995;
Variables tab:julian_power=2000;
Colors tab:Transform color=0.55;Color speed=0.6;
Adjustment window で。Scale=25;
Camera tab で Zoom=0.15;X-position=0.35;Y-posision=0;Rotation=-15;
Gradient tabで色番号153を選択。;
Display Density の値を大きくすると綺麗になります。
(ただ、再描画に時間はかかります。)
以上で下図のような画像となります。
TO Menu
(2)3D flame pack から:
参照した flame pack は
こちら です。
New flame T1:Weight=0.5;
Variations tab:linear=0;bubble=0.5;pre_blur=1;rectangles=0.05;
Colors tab:Transform color=0.08;Color speed=-1;
New transform T2:
Variations tab:linear=0;julia3D=1;
Variables tab:julia3D_power=-2;
Triangle tab:0.6右へ移動。
Colors tab:Transform color=0.44;Color speed=0.9;
Adjustment window で。Pitch=50;Yaw=40;Scale=25;
Rendering tab:Gamma=3;Brightness=10;
Gradient tabで色番号101を選択。;
Display Density の値を大きくすると綺麗になります。
(ただ、再描画に時間はかかります。)
以上で下図のような画像となります。
TO Menu
(3)Bubble Flames から:
参照した flame は
こちら です。
New flame T1:
Variations tab:linear=0.015;bubble=0.3;pre_blur=1.5;
Triangle tab:0.1 左へ移動。125 で1回拡大。
Colors tab:Transform color=0.286;Color speed=0;
New transform T2:Weight=1;
Variations tab:linear=0;julia3D=1;
Variables tab:julia3D_power=-2;
Triangle tab:0.15 左へ移動。0.5 下へ移動。125 で3 回拡大。さらに 110 で 1 回拡大。
Colors tab:Transform color=0;Color speed=0;
Adjustment window で。Pitch=56;Yaw=-198;Scale=25;
Camera tab で Zoom=0.164;Rotation=-3.5;
Rendering tab:Gamma=1.37;Brightness=2.9;
Gradient tabで色番号418を選択。;
Display Density の値を大きくすると綺麗になります。
(ただ、再描画に時間はかかります。)
以上で下図のような画像となります。
TO Menu
(4)Disc Julian から:
参照した Tutorial は
こちら です。
New flame T1:
Variations tab:linear=0;julian=1;
Variables tab:julian_power=-50;
Colors tab:Transform color=1;Color speed=0;
New transform T2:Weight=10;
Variations tab:linear=0;disc=1;
Triangle tab:120°で反時計回りに回転。110 で 1 回縮小。
Colors tab:Transform color=057;Color speed=0.9;
Adjustment window で。Scale=35;
Rendering tab:Gamma=1.5;Brightness=5;
Gradient tabで色番号186を選択。;
Display Density の値を大きくすると綺麗になります。
(ただ、再描画に時間はかかります。)
以上で下図のような画像となります。
TO Menu
(5)Cpow-Ring2 Tutorial から:
参照した Tutorial は
こちら です。
New flame T1:Weight=0.5;
Variations tab:linear=0;cpow=1;
Variables tab:cpow_r=1;cpow_i=0;cpow_power=800;
New transform T2:Weight=100;
Variations tab:linear=0;rings2=1;
Variables tab:rings2_val=1;
Triangle tab:0.2 右へ移動。
Colors tab:Transform color=0;Color speed=0.9;
Adjustment window で。Scale=40;
Gradient tabで色番号368を選択。;
Display Density の値を大きくすると綺麗になります。
(ただ、再描画に時間はかかります。)
以上で下図のような画像となります。
TO Menu
(6)Julian Bwraps Tutorial から:
参照した Tutorial は
こちら です。
New flame T1:
Variations tab:linear=0;separation=1.5;
New transform T2:
Variations tab:linear=0;spherical=1;
Colors tab:Transform color=0.5;Color speed=0;
New transform T3:
Variations tab:linear=0;julian=1;
Variables tab:julian_power=3;julian_dist=1.5;
Colors tab:Transform color=1;Color speed=0;
Adjustment window で。Scale=20;
Rendering tab:Gamma=3;Brightness=20;
Gradient tabで色番号565を選択。;
Display Density の値を大きくすると綺麗になります。
(ただ、再描画に時間はかかります。)
以上で下図のような画像となります。
TO Menu
(7)Bubbles 等を使って:
参照した Tutorial はありません
New flame T1:
Variations tab:linear=0;sphericsl=1;hyperbolic=0.5;pre_blur=1;rectangles=1;
Variables tab:rectangles_x=1;rectangles_y=1;
Colors tab:Transform color=0.35;Color speed=0.2;
New transform T2:
Variations tab:linear=0;bubble=0.5;
Colors tab:Transform color=0.44;Color speed=0;
New transform T3:
Variations tab:linear=0;zcone=-0.006;julia3D=2;
Variables tab:julia3D_power=-2;
Colors tab:Transform color=0.17;Color speed=0;
Adjustment window で。Scale=15;
Rendering tab:Gamma=3;Brightness=20;
Gradient tabで色番号323を選択。;
Display Density の値を大きくすると綺麗になります。
(ただ、再描画に時間はかかります。)
以上で下図のような画像となります。
TO Menu
(8)Xaos Bubbles Tutorial から:
参照した Tutorial は
こちら です。
New flame T1:
Variations tab:linear=0;pre_blur=1;hexes=1;
Variables tab:hexes_rotate=0.166;
Colors tab:Transform color=0.31;Color speed=0.5;
New transform T2:
Variations tab:linear=0;bubble=0.5;
Colors tab:Transform color=0.6;Color speed=0;
New transform T3:
Variations tab:linear=0;zcone=-0.006;julia3D=2;
Variables tab:julia3D_power=-2;
Triangle tab:1.2 右へ移動。
Colors tab:Transform color=0.17;Color speed=0.9;
Transform:窓に T1 を表示させる。
Xaos tab:"to 1"=0;"to 2"=1;"to 3"=0;
Transform:窓に T2 を表示させる。
Xaos tab:"to 1"=1;"to 2"=0;"to 3"=1;
Transform:窓に T3 を表示させる。
Xaos tab:"to 1"=0;"to 2"=1;"to 3"=0;
Adjustment window で。Pitch=60;Scale=15;
Rendering tab:Gamma=3;Brightness=20;
Gradient tabで色番号475を選択。;
Display Density の値を大きくすると綺麗になります。
(ただ、再描画に時間はかかります。)
以上で下図のような画像となります。
TO Menu
(9)Spherical Bubbles Tutorial から:
参照した Tutorial は
こちら です。
New flame T1:Weight=5;
Variations tab:linear=0;spherical=3.3;eyefish=0.2;
Triangle tab:70°で反時計回りに回転。0.2 左へ移動。0.4下へ移動。
2回縮小;
Colors tab:Transform color=0.04;Color speed=0.99;
New transform T2:Weight=0.85;
Variations tab:linear=0;bubble=0.45;pre_blur=5;
Colors tab:Transform color=0.32;Color speed=-0.5;
Adjustment window で。Scale=12;
Rendering tab:Gamma=4;Brightness=10;
Gradient tabで色番号119を選択。;
Display Density の値を大きくすると綺麗になります。
(ただ、再描画に時間はかかります。)
以上で下図のような画像となります。
TO Menu
(10)JP-Talma Tutorial 4 から:
参照した Tutorial は
こちら です。
New flame T1:
Variations tab:linear=1;
Triangle tab:45°反時計回り;0.6 右へ移動。0.3上へ移動。;
Colors tab:Transform color=0.57;Color speed=0;
New transform T2:
Variations tab:linear=1;
Triangle tab:120°反時計回り;1回縮小;
Colors tab:Transform color=0.38;Color speed=0.3;
New transform T3:
Variations tab:linear=0;cylinder=0.24;pre_blur=2;
Triangle tab:3.0 右へ移動。3.0下へ移動。;
Colors tab:Transform color=0.25;Color speed=0.5;
Transform:窓に T2 を表示させる。
Xaos tab:"to 1"=1;"to 2"=25;"to 3"=1;
Transform:窓に T3 を表示させる。
Xaos tab:"to 1"=1;"to 2"=0;"to 3"=1;
Adjustment window で。Scale=35;
Rendering tab:Gamma=3;Brightness=10;
Gradient tabで色番号276を選択。;
Display Density の値を大きくすると綺麗になります。
(ただ、再描画に時間はかかります。)
以上で下図のような画像となります。
TO Menu
(11)Apo-Spiked-3D-Jurian から:
参照した Tutorial は
こちら です。
New flame T1:
Variations tab:linear=0;blur=0.2;
Colors tab:Transform color=0.06;Color speed=-0.95;
New transform T2:Weight=3;
Variations tab:linear=0;julian=1.35;
Variables tab:julian_power=2;julian_dist=-1;
Triangle tab:45°反時計回り;0.24上へ移動。;
Colors tab:Transform color=0.55;Color speed=0.9;
New transform T3:Weight=1;
Variations tab:linear=0;julian=0.2;
Variables tab:julian_power=15;julian_dist=-1;
Triangle tab:125で1回縮小;
Colors tab:Transform color=0.31;Color speed=0.5;
New transform T4:
Variations tab:linear=0;julian=0.3;
Variables tab:julian_power=8;julian_dist=-1;
Triangle tab:45°反時計回り;125で2回縮小;
Colors tab:Transform color=0.19;Color speed=0.35;
Adjustment window で。Scale=15;
Camera tab で Rotation=-45;
Rendering tab:Gamma=3;Brightness=10;
Gradient tabで色番号153を選択。;
Display Density の値を大きくすると綺麗になります。
(ただ、再描画に時間はかかります。)
以上で下図のような画像となります。
TO Menu
(12)apophysis-heart-tutorial から:
参照した Tutorial は
こちら です。
New flame T1:Weight=1;
Variations tab:linear=0;blur=0.5;
Colors tab:Transform color=0.61;Color speed=0;
New transform T2:Weight=0.4;
Variations tab:linear=0;sinusoidal=12.5433;cylinder=0.005;
Colors tab:Transform color=0.15;Color speed=0;
New transform T3:Weight=2;
Variations tab:linear=0;julian=0.65;
Variables tab:julian_power=4;julian_dist=1;
Colors tab:Transform color=0.53;Color speed=0;
Enable final transform Fx:
Variations tab:linear=0;juliascope=1;
Variables tab:juliascope_power=2;juliascope_dist=1;
Triangle tab:0.42上へ移動。;
Adjustment window で。Scale=25;
Rendering tab:Gamma=3;Brightness=10;
Gradient tabで色番号108を選択。;
Display Density の値を大きくすると綺麗になります。
(ただ、再描画に時間はかかります。)
以上で下図のような画像となります。
TO Menu
(13)swirl 等を使って:
参照した Tutorial はありません。
New flame T1:Weight=1;
Variations tab:linear=0;flatten=1;swirl=1;epispiral=1;
Colors tab:Transform color=0.83;Color speed=0.9;
New transform T2:Weight=0.2;
Variations tab:linear=1.5;
Triangle tab:125で10回縮小;
Colors tab:Transform color=0.28;Color speed=-0.1;
New transform T3:
Variations tab:linear=0;julian=1;
Variables tab:julian_power=7;julian_dist=-1;
Triangle tab:45°反時計回り;0.2上へ移動。;
Colors tab:Transform color=0.52;Color speed=0;
Adjustment window で。Scale=25;
Rendering tab:Gamma=3;Brightness=10;
Gradient tabで色番号351を選択。;
Display Density の値を大きくすると綺麗になります。
(ただ、再描画に時間はかかります。)
以上で下図のような画像となります。
TO Menu
(14)Apophysis-Starter-Flames-IV から:
参照した Tutorial は
こちら です。
New flame T1:Weight=1.5;
Variations tab:linear=0;swirl=0.1;disc=0.1;gaussian_blur=0.2;
Colors tab:Transform color=0.182;Color speed=0.2;
New transform T2:Weight=50;
Variations tab:linear=0;julian=1;
Variables tab:julian_power=2;julian_dist=-1;
Triangle tab:45°反時計回り;1.355上へ移動。;
Colors tab:Transform color=0.955;Color speed=0.25;
New transform T3:Weight=2;
Variations tab:linear=0;julian=0.3;
Variables tab:julian_power=50;julian_dist=-1;
Triangle tab:45°反時計回り;
Colors tab:Transform color=0.54;Color speed=0;
New transform T4:Weight=1;
Variations tab:linear=0;julian=0.25;
Variables tab:julian_power=8;julian_dist=1;
Triangle tab:45°反時計回り;
Colors tab:Transform color=0.851;Color speed=0;
Adjustment window で。Scale=12;
Camera tab で Rotation=-45;
Rendering tab:Gamma=3.5;Brightness=11;
Gradient tabで色番号129を選択。;
Display Density の値を大きくすると綺麗になります。
(ただ、再描画に時間はかかります。)
以上で下図のような画像となります。
TO Menu
(15)julian-rings2 から:
参照した Tutorial は
こちら です。
New flame T1:Weight=1;
Variations tab:linear=0;sinusoidal=0.05;julian=1;
Variables tab:julian_power=7000;julian_dist=5;
Colors tab:Transform color=0.23;Color speed=-0.8;
New transform T2:Weight=3;
Variations tab:linear=0;rings2=1;
Variables tab:rings2_val=-1;
Triangle tab:1.2上へ移動。;5回拡大。;
Colors tab:Transform color=0.513;Color speed=0;
Enable final transform Fx:
Variations tab:linear=0;juliascope=1;
Variables tab:juliascope_power=2;juliascope_dist=1;
Triangle tab:0.72下へ移動。;
Adjustment window で。Scale=25;
Camera tab で Rotation=180;
Rendering tab:Gamma=3;Brightness=10;
Gradient tabで色番号207を選択。;
Display Density の値を大きくすると綺麗になります。
(ただ、再描画に時間はかかります。)
以上で下図のような画像となります。
TO Menu
(16)Blooms Tutorial から:
参照した Tutorial は
こちら です。
New flame T1:Weight=0.5;
Variations tab:linear=0;gaussian_blur=0.5;
Colors tab:Transform color=0.05;Color speed=0;
New transform T2:Weight=5;
Variations tab:linear=1;spherical=0.1;cross=0.015;
Variables tab:rings2_val=-1;
Triangle tab:90°反時計回り。;0.6上へ移動。;1回拡大。;
Colors tab:Transform color=0.625;Color speed=0;
Enable final transform Fx:
Variations tab:linear=0;julian=2;
Variables tab:julian_power=-2;julian_dist=1;
Adjustment window で。Scale=15;
Rendering tab:Gamma=3;Brightness=15;
Gradient tabで色番号260を選択。;
Display Density の値を大きくすると綺麗になります。
(ただ、再描画に時間はかかります。)
以上で下図のような画像となります。
TO Menu
(17)3D flame pack から:
参照した flame pack は(2)と同じ。
New flame T1:Weight=0.5;
Variations tab:linear=0;pre_blur=1.5;separation=5;
Variables tab:separation_x=1;separation_y=1;
separation_xinside=0;separation_yinside=0;
Triangle tab:2回拡大。;
Colors tab:Transform color=0.286;Color speed=0;
New transform T2:Weight=0.5;
Variations tab:linear=0;bubble=0.021;julia3D=2;
Variables tab:julia3D_power=-2;
Triangle tab:0.4下へ移動。;0.1左へ移動。;5回拡大。;
Enable final transform Fx:
Variations tab:linear=0;julia3D=1;
Variables tab:julia3D_power=-2;
Triangle tab:0.25右へ移動。;1回縮小。;
Adjustment window で。Pitch=53;Yaw=-127;Scale=25;
Rendering tab:Gamma=3;Brightness=10;
Gradient tabで色番号351を選択。;
Display Density の値を大きくすると綺麗になります。
(ただ、再描画に時間はかかります。)
以上で下図のような画像となります。
TO Menu
(18)3D flame pack から:
参照した flame pack は(2)と同じ。
New flame T1:Weight=0.5;
Variations tab:linear=0;bubble=0.2;pre_blur=1.5;separation=2;
Variables tab:separation_x=1;separation_y=1;
separation_xinside=0;separation_yinside=0;
Triangle tab:0.74下へ移動。;1.1右へ移動。;6回拡大。;
Colors tab:Transform color=0.7;Color speed=0;
New transform T2:Weight=0.5;
Variations tab:linear=0;zcone=-0.04;julia3D=1;
Variables tab:julia3D_power=-2;
Triangle tab:90°反時計回り;1.5下へ移動。;0.5右へ移動。;6回拡大。;
Colors tab:Transform color=0.41;Color speed=0;
New transform T3:Weight=0.5;
Variations tab:linear=0;ztranslate=-0.01;julia3D=0.5;
Variables tab:julia3D_power=-2;
Triangle tab:90°時計回り;0.44上へ移動。;0.3右へ移動。;110で1回拡大。;
Colors tab:Transform color=0.09;Color speed=0;
Adjustment window で。Pitch=37;Yaw=-12;Scale=20;
Camera tab:Zoom=0.8;
Rendering tab:Gamma=3;Brightness=5;
Gradient tabで色番号099を選択。;
Display Density の値を大きくすると綺麗になります。
(ただ、再描画に時間はかかります。)
以上で下図のような画像となります。
TO Menu
(19) flame pack から:
参照した flame pack はこちら です。
New flame T1:Weight=0.5;
Variations tab:linear=0;flatten=1;spherical=1;
Triangle tab:60°反時計回り;0.63下へ移動。;1.42右へ移動。;125で1回縮小。;
Colors tab:Transform color=0.59;Color speed=0;
New transform T2:Weight=0.5;
Variations tab:linear=0.5;flatten=1;radial_blur=0.45;
Variables tab:radial_blur_angle=-0.278;
Triangle tab:90°反時計回り;0.52下へ移動。;0.63左へ移動。;110で6回縮小。;
Colors tab:Transform color=0.519;Color speed=0;
New transform T3:Weight=0.5;
Variations tab:linear=0;flatten=1;sinusoidal=1;
Triangle tab:60°反時計回り;0.15下へ移動。;0.52右へ移動。;110で1回縮小。;
Colors tab:Transform color=0.276;Color speed=0.3;
Xaos tab:"to"1=1;"to"2=0;"to"3=8;
Adjustment window で。Scale=50;
Camera tab:Zoom=0.21;Y-position=-0.3;
Rendering tab:Gamma=1;Brightness=1;
Gradient tabで色番号097を選択。;
Display Density の値を大きくすると綺麗になります。
(ただ、再描画に時間はかかります。)
以上で下図のような画像となります。
TO Menu
(20) flame pack から:
参照した flame pack はこちら です。
New flame T1:Weight=1;
Variations tab:linear=0;flatten=1;spherical=0.2;radial_blur=0.54;
Variables tab:radial_blur_angle=0.74;
Triangle tab:0.86下へ移動。;0.81右へ移動。;125で9回縮小。;
Colors tab:Transform color=0;Color speed=0;
New transform T2:Weight=2;
Variations tab:linear=0.5;flatten=1;spherical=1;
Triangle tab:0.49上へ移動。;0.46左へ移動。;125で4回縮小。;
Colors tab:Transform color=1;Color speed=0;
New transform T3:Weight=4;
Variations tab:linear=1;flatten=1;
Triangle tab:45°時計回り;0.19下へ移動。;0.14左へ移動。;125で1回縮小。;
Colors tab:Transform color=0.429;Color speed=0;
Adjustment window で。Scale=35;
Camera tab:X-position=0.48;Y-position=-0.5;
Rendering tab:Gamma=2;Brightness=10;
Gradient tabで色番号591を選択。;
Display Density の値を大きくすると綺麗になります。
(ただ、再描画に時間はかかります。)
以上で下図のような画像となります。
TO Menu
(21) Built-in-Creativity から:
参照した Tutorial はこちら です。
New flame T1:Weight=3;
Variations tab:linear=0;julian=1;
Variables tab:julian_power=2;julian_dist=-1;
Triangle tab:0.5上へ移動。;0.5右へ移動。;
Colors tab:Transform color=0.6;Color speed=0.4;
New transform T2:Weight=0.5;
Variations tab:linear=0;polar=1;pre_blur=0.1;
Transform tab:下側の座標入力欄(post transform)のX座標に
{ 0.1, 0};Y座標に{ 0, 2}を入力する。
Colors tab:Transform color=0;Color speed=0;Opacity=0;
Enable final transform Fx:
Variations tab:linear=0;spherical=1;
Colors tab:Transform color=1;Color speed=0.3;
Adjustment window で。Scale=22;
Rendering tab:Gamma=3;Brightness=10;
Gradient tabで色番号260を選択。;
Display Density の値を大きくすると綺麗になります。
(ただ、再描画に時間はかかります。)
以上で下図のような画像となります。
TO Menu
(22) Flame Pack から:
参照した flame pack はこちら です。
New flame T1:Weight=0.5;
Variations tab:linear=0.95;spherical=0.05;
Variables tab:julian_power=2;julian_dist=-1;
Triangle tab:15°反時計回り。;0.04下へ移動。;0.3右へ移動。;110で3回縮小。;
Colors tab:Transform color=1;Color speed=0;
New transform T2:Weight=0.5;
Variations tab:linear=1;
Triangle tab:15°反時計回り。;0.17上へ移動。;0.5左へ移動。;110で3回縮小。;
Colors tab:Transform color=0.5;Color speed=0;
New transform T3:Weight=0.5;
Variations tab:linear=0.95;sinusoidal=0.05;
Triangle tab:Transform座標欄のX座標に{0.317,-0.168}を入力。
続いて 6°反時計回り。;0.31上へ移動。;0.14左へ移動。;110で1回拡大。;
Colors tab:Transform color=0;Color speed=0;
Adjustment window で。Scale=20;
Camera tab:X-Position=-0.3;Y-Position=-0.5;
Rendering tab:Gamma=2.5;Brightness=7;
Gradient tabで色番号275を選択。;
Display Density の値を大きくすると綺麗になります。
(ただ、再描画に時間はかかります。)
以上で下図のような画像となります。
TO Menu
(23) cross等を使って:
参照したものはありません。
New flame T1:Weight=2;
Variations tab:linear=0;zblur=0.63;cross=0.36;
Triangle tab:192°反時計回り。;0.66下へ移動。;0.96左へ移動。;110で1回縮小。;
Colors tab:Transform color=0;Color speed=0.5;
New transform T2:Weight=0.2;
Variations tab:linear=0;pre_rotate_y=0.87;bwraps=0.13
Variables tab:bwrapsで上から{ 1, 0, 1, 0, 0}に;
Triangle tab:60°時計回り。;0.15下へ移動。;0.27右へ移動。;110で16回縮小。;
Colors tab:Transform color=0.6;Color speed=0;
Adjustment window で。Scale=25;
Camera tab:X-Position=-0.3;Y-Position=-0.5;
Rendering tab:Gamma=4;Brightness=10;
Gradient tabで色番号153を選択。;
Display Density の値を大きくすると綺麗になります。
(ただ、再描画に時間はかかります。)
以上で下図のような画像となります。
TO Menu
(24) eyefish 等を使って:
参照したものはありません。
New flame T1:Weight=3;
Variations tab:linear=0;eyefish=0.01;loonie=0.75;
Triangle tab:125°反時計回り。;0.3上へ移動。;0.5左へ移動。;110で1回縮小。;
Colors tab:Transform color=0.535;Color speed=0.1;
New transform T2:Weight=0.8;
Variations tab:linear=0;swirl=0.57;splits=0.7
Variables tab:splits_x=2;splits_y=2;
Triangle tab:15°反時計回り。;125で1回拡大。;
Colors tab:Transform color=0.273;Color speed=0.1;
Adjustment window で。Scale=10;
Rendering tab:Gamma=3;Brightness=10;
Gradient tabで色番号097を選択。;
Display Density の値を大きくすると綺麗になります。
(ただ、再描画に時間はかかります。)
以上で下図のような画像となります。
TO Menu
(25) curl3D 等を使って:
参照したものはありません。
New flame T1:Weight=0.6;
Variations tab:linear=0;curl3D=0.33;blur_zoom=0.67;
Variables tab:curl3D はすべて 0;
Triangle tab:83°時計回り。;0.71下へ移動。;0.2左へ移動。;105で1回拡大。;
Colors tab:Transform color=0.51;Color speed=0;
New transform T2:Weight=1;
Variations tab:linear=0;separation=0.077;waves2=0.923;
Variables tab:separationでは上から順に{ 2, 2, 0, 1, 1, 0};
waves2では上から順に{ 1, 1, 0, 0};
Triangle tab:115°時計回り。;125で2回縮小。さらに110で3回縮小;
Colors tab:Transform color=1;Color speed=0;
Adjustment window で。Scale=18;
Camera tab:X-Position=-0.2;Y-Position=0.3;
Rendering tab:Gamma=3;Brightness=10;
Gradient tabで色番号571を選択。;
Display Density の値を大きくすると綺麗になります。
(ただ、再描画に時間はかかります。)
以上で下図のような画像となります。
TO Menu
(26) Xaos revealed tutorial から:
参照した tutorial はこちら です。
New flame T1:Weight=0.5;
Variations tab:linear=0;flatten=1;pre_blur=1;ngon=0.5;
Variables tab:ngon_sides=4;ngon_power=1;他は1;
Colors tab:Transform color=0.267;Color speed=-0.5;opacity=0;
New transform T2:Weight=5;
Variations tab:linear=1;flatten=1;
Triangle tab:16.5°反時計回り。;125で1回縮小。;
Colors tab:Transform color=0;Color speed=0.9;opacity=0;
New transform T3:Weight=0.5;
Variations tab:linear=1;flatten=1;
Triangle tab:1.0右へ移動。;
Colors tab:Transform color=0;Color speed=1;opacity=0;
New transform T4:Weight=0.5;
Variations tab:linear=1;
Triangle tab:1.0上へ移動。;
Colors tab:Transform color=0;Color speed=1;opacity=0;
New transform T5:Weight=0.5;
Variations tab:linear=1;
Triangle tab:1.0左へ移動。;
Colors tab:Transform color=0;Color speed=1;opacity=0;
New transform T6:Weight=0.5;
Variations tab:linear=1;
Triangle tab:1.0下へ移動。;
Colors tab:Transform color=0;Color speed=1;opacity=0;
New transform T7:Weight=0.5;
Variations tab:linear=0;bubble=0.5;
Triangle tab:200で1回縮小。;
Colors tab:Transform color=0;Color speed=1;opacity=1;
New transform T8:Weight=2;
Variations tab:linear=0;flatten=1;julian=1;
Variables tab:julian_power=-2;julian_dist=1;
Triangle tab:0.5右へ移動。;
Colors tab:Transform color=0.164;Color speed=0.975;opacity=1;
ここで以下のように Xaos の設定を行います。
Transform窓に T1 を選択。
Xaos tab:"to"で上から順に{1,1,1,1,1,1,1,0}と入力。;
"from"で上から順に{1,1,1,1,1,1,1,1}と入力。;
Transform窓に T2 を選択。
Xaos tab:"to"で上から順に{1,1,1,1,1,1,1,0}と入力。;
"from"で上から順に{1,1,0,0,0,0,0,0}と入力。;
Transform窓に T3 を選択。
Xaos tab:"to"で上から順に{1,0,1,1,1,1,1,0}と入力。;
"from"で上から順に{1,1,1,1,1,1,0,0}と入力。;
Transform窓に T4 を選択。
Xaos tab:"to"で上から順に{1,0,1,1,1,1,1,0}と入力。;
"from"で上から順に{1,1,1,1,1,1,0,0}と入力。;
Transform窓に T5 を選択。
Xaos tab:"to"で上から順に{1,0,1,1,1,1,1,0}と入力。;
"from"で上から順に{1,1,1,1,1,1,0,0}と入力。;
Transform窓に T6 を選択。
Xaos tab:"to"で上から順に{1,0,1,1,1,1,1,0}と入力。;
"from"で上から順に{1,1,1,1,1,1,0,0}と入力。;
Transform窓に T7 を選択。
Xaos tab:"to"で上から順に{1,0,0,0,0,0,0,1}と入力。;
"from"で上から順に{1,1,1,1,1,1,0,0}と入力。;
Transform窓に T8 を選択。
Xaos tab:"to"で上から順に{1,0,0,0,0,0,0,1}と入力。;
"from"で上から順に{0,0,0,0,0,0,1,1}と入力。;
Adjustment window で。Scale=30;
Rendering tab:Gamma=3;Brightness=15;
Gradient tabで色番号186を選択。;
Display Density の値を大きくすると綺麗になります。
(ただ、再描画に時間はかかります。)
以上で下図のような画像となります。
TO Menu
(27) julian 等を使って:
参照したものはありません。
New flame T1:Weight=0.2;
Variations tab:linear=0;spherical=1;cylinder=1:pre_blur=1;
Triangle tab:90°反時計回り。;
Colors tab:Transform color=0.38;Color speed=0.2;
New transform T2:Weight=0.5;
Variations tab:linear=0;julian=1;
Variables tab:julian_power=3;julian_dist=-1;
Triangle tab:125で30回縮小。;
Colors tab:Transform color=0.15;Color speed=0;
Adjustment window で。Scale=5;
Rendering tab:Gamma=3;Brightness=20;
Gradient tabで色番号255を選択。;
Display Density の値を大きくすると綺麗になります。
(ただ、再描画に時間はかかります。)
以上で下図のような画像となります。
TO Menu
(28) heart flame pack から:
参照した flame pack はこちら です。
New flame T1:Weight=0.25;
Variations tab:linear=0;flatten=1;diamond=0.36;
Triangle tab:30°時計回り。;0.96左へ;0.14上へ;
Colors tab:Transform color=0;Color speed=0;
New transform T2:Weight=0.25;
Variations tab:linear=0;flatten=1;
Triangle tab:85°時計回り。;0.13上へ;125で1回縮小。;
Colors tab:Transform color=0.167;Color speed=0;
New transform T3:Weight=0.25;
Variations tab:linear=0;flatten=1;blur=1;
Colors tab:Transform color=0.333;Color speed=1;
New transform T4:Weight=0.5;
Variations tab:linear=1;flatten=1;sinusoidal=1;
Colors tab:Transform color=0.5;Color speed=0;
New transform T5:Weight=1;
Variations tab:linear=0.9;flatten=1;spherical=10;
Triangle tab:0.1右へ;0.1下へ
Colors tab:Transform color=0.667;Color speed=0;
New transform T6:Weight=1;
Variations tab:linear=0.9;flatten=1;spherical=10;
Triangle tab:0.1左へ;0.1上へ;
Colors tab:Transform color=0.833;Color speed=0;
New transform T7:Weight=1;
Variations tab:linear=0;flatten=1;noise=0.1;
Colors tab:Transform color=1;Color speed=0;
Enable final transform Fx:
Variations tab:linear=0;flatten=1;juliascope=0.625;
Variables tab:juliascope_power=2;juliascope_dist=1;
Triangle tab:0.5上へ;
Colors tab:Transform color=0;Color speed=0;
Adjustment window で。Scale=8;
Camera tab:Y-position=-0.4;
Rendering tab:Gamma=2;Brightness=70;
Gradient tabで色番号317を選択。;
Display Density の値を大きくすると綺麗になります。
(ただ、再描画に時間はかかります。)
以上で下図のような画像となります。
TO Menu
(29) heart flame pack から:
参照した flame pack は (28) と同じです。
New flame T1:Weight=0.25;
Variations tab:linear=0;flatten=1;blur=0.5;
Colors tab:Transform color=0.72;Color speed=-1;
New transform T2:Weight=10;
Variations tab:linear=0;spherical=17.8;cylinder=0.005;
Triangle tab:175°反時計回り。;1.9右へ;0.1上へ;110で9回拡大。;
Colors tab:Transform color=0.79;Color speed=0.9;
New transform T3:Weight=0.5;
Variations tab:linear=0;flatten=1;juliascope=0.35;
Variables tab:juliascope_power=4;juliascope_dist=1;
Triangle tab:110で27回拡大。;
Colors tab:Transform color=0;Color speed=0;
New transform T4:Weight=0.5;
Variations tab:linear=0;flatten=1;julian=0.7;
Variables tab:julian_power=2008;julian_dist=-70.28;
Colors tab:Transform color=0;Color speed=0;
Enable final transform Fx:
Variations tab:linear=0;flatten=1;juliascope=0.625;
Variables tab:juliascope_power=2;juliascope_dist=1;
Triangle tab:0.5上へ;
Colors tab:Transform color=0;Color speed=0;
Adjustment window で。Scale=20;
Rendering tab:Gamma=2;Brightness=4;
Gradient tabで色番号665を選択。;
Display Density の値を大きくすると綺麗になります。
(ただ、再描画に時間はかかります。)
以上で下図のような画像となります。
TO Menu
(30) 3D bubble flame pack から:
参照した flame pack はこちら です。
New flame T1:Weight=0.5;
Variations tab:linear=0;bubble=0.2;pre_blur=1;
Triangle tab:90°時計回り。;0.27左へ;0.13下へ;
Colors tab:Transform color=0.6;Color speed=-1;
New transform T2:Weight=0.5;
Variations tab:linear=0;julia3D=1;
Variables tab:julia3D_power=-2;
Triangle tab:135°反時計回り。;0.14右へ;0.78下へ;
Colors tab:Transform color=0.524;Color speed=0;
New transform T3:Weight=0.5;
Variations tab:linear=0;julia3D=1;
Variables tab:julia3D_power=2;
Triangle tab:99°時計回り。;1.21左へ;0.36上へ;
Colors tab:Transform color=0.064;Color speed=0;
Enable final transform Fx:
Variations tab:linear=0;curl3D=1;
Variables tab:curl3D_cx=-0.083;curl3D_cy=0.378;curl3D_cz=-0.03;
Triangle tab:59°反時計回り。;0.19左へ;0.04上へ;
Colors tab:Transform color=0;Color speed=1;
Adjustment window で。Scale=32;Pitch=68;Yaw=91;
Camera tab:Zoom=0.35;X-position=0.24;
Rendering tab:Gamma=3;Brightness=7;
Gradient tabで色番号108を選択。;
Display Density の値を大きくすると綺麗になります。
(ただ、再描画に時間はかかります。)
以上で下図のような画像となります。
TO Menu
(31) hyperbolic 等を使って:
参照したものはありません。:
New flame T1:Weight=2;
Variations tab:linear=0;hyperbolic=0.53;wedge=0.46;
Variables tab:wedge{ 1.5, 0, 2, 0};
Triangle tab:100°反時計回り。;0.75左へ;0.64下へ;
Colors tab:Transform color=0.74;Color speed=0;
New transform T2:Weight=3;
Variations tab:linear=0;escher=0.62;crop=0.37;
Variables tab:escher_beta=0;crop{ -1, -1, 1, 1, 0, 0}
Triangle tab:140°時計回り。;0.36左へ;0.5上へ;110で 1回縮小;
Colors tab:Transform color=0.41;Color speed=0;
Enable final transform Fx:
Variations tab:linear=0;julian=1;
Variables tab:julian_power=3;julian_dist=-3;
Colors tab:Transform color=0;Color speed=1;
Adjustment window で。:Scale=15;
Rendering tab:Gamma=3;Brightness=10;
Gradient tabで色番号596を選択。;
Display Density の値を大きくすると綺麗になります。
(ただ、再描画に時間はかかります。)
以上で下図のような画像となります。
TO Menu
(32) radial_blur 等を使って:
参照したものはありません。:
New flame T1:Weight=0.2;
Variations tab:linear=0;pre_ztranslate=0.7;radial_blur=0.24;
Variables tab:radial_blur_angle=0.16;
Triangle tab:7°時計回り。;1.0右へ;0.38下へ;125で 1回拡大
Colors tab:Transform color=0;Color speed=0;
New transform T2:Weight=0.5;
Variations tab:linear=0;cylinder=0.58;post_curl=0.42;
Variables tab:post_curl_c1=0;post_curl_c2=0;
Triangle tab:143°反時計回り。;0.13左へ;0.18上へ;110で 3回拡大;
Colors tab:Transform color=0.53;Color speed=0.1;
Adjustment window で。:Scale=200;
Camera tab:X-position=-0.05;Y-position=-0.05;
Rendering tab:Gamma=3;Brightness=4;
Gradient tabで色番号345を選択。;
Display Density の値を大きくすると綺麗になります。
(ただ、再描画に時間はかかります。)
以上で下図のような画像となります。
TO Menu
(33) curl3D 等を使って:
参照したものはありません。:
New flame T1:Weight=0.5;
Variations tab:linear=0;curl3D=0.9;foci=0.095;
Variables tab:curl3D はすべて 0;
Triangle tab:125°時計回り。;0.64下へ。;0.13右へ。;125で1回縮小。;
Colors tab:Transform color=0.19;Color speed=-0.6;
New transform T2:Weight=0.5;
Variations tab:linear=0;horseshoe=0.83;pre_zscale=0.17;
Triangle tab:170°時計回り。;0.45上へ。;0.68左へ。110で2回縮小;
Colors tab:Transform color=0.55;Color speed=0;
Adjustment window で。Scale=22;
Camera tab:Y-Position=0.33;
Rendering tab:Gamma=3;Brightness=10;
Gradient tabで色番号195を選択。;
Display Density の値を大きくすると綺麗になります。
(ただ、再描画に時間はかかります。)
以上で下図のような画像となります。
TO Menu
(34) bipolar shape tutorialから:
参照した tutorial は
こちら です。
New flame T1:Weight=3;
Variations tab:linear=0;bipolar=1;
Variables tab:bipolar_shift=0;
Triangle tab:90°時計回り。; 1 右へ。;
Colors tab:Transform color=0.15;Color speed=0;
New transform T2:Weight=0.5;
Variations tab:linear=1;
Triangle tab:90°時計回り。; 2 下へ。;
Colors tab:Transform color=0.8;Color speed=0;
New transform T3:Weight=0.5;
Variations tab:linear=1;
Triangle tab:90°時計回り。; 2 上へ。;
Colors tab:Transform color=0.8;Color speed=0;
New transform T4:Weight=3;
Variations tab:linear=0;bipolar=1;
Variables tab:bipolar_shift=0;
Triangle tab:90°時計回り。; 1 左へ。;
Colors tab:Transform color=0.15;Color speed=0;
New transform T5:Weight=0.5;
Variations tab:linear=0;splits=1;pre_blur=10;
Variables tab:splits_x=3;splits_y=3;
Triangle tab:180°回転。;125 で 4回拡大。;
Colors tab:Transform color=0.8;Color speed=0;
Adjustment window で。Scale=30;
Rendering tab:Gamma=3;Brightness=50;
Gradient tabで色番号322を選択。;
Display Density の値を大きくすると綺麗になります。
(ただ、再描画に時間はかかります。)
以上で下図のような画像となります。
TO Menu
(35) loonie等を使って:
参照したものはありません。
New flame T1:Weight=0.8;
Variations tab:linear=0;loonie=0.81;post_curl=0.19;
Variables tab:post_curl_c1=0;post_curl_c2=0;
Colors tab:Transform color=0;Color speed=0;
New transform T2:Weight=0.36;
Variations tab:linear=0;foci=0.578;pre_sinusoidal=0.422
Colors tab:Transform color=1;Color speed=0;
Adjustment window で。Scale=15;
Rendering tab:Gamma=3;Brightness=10;
Gradient tabで色番号276を選択。;
Display Density の値を大きくすると綺麗になります。
(ただ、再描画に時間はかかります。)
以上で下図のような画像となります。
TO Menu
(36) loonie等を使って:
参照したものはありません。
New flame T1:Weight=0.8;
Variations tab:linear=0;loonie=0.6234;post_curl=0.19;
Variables tab:post_curl_c1=0;post_curl_c2=0;
Colors tab:Transform color=0;Color speed=0;
New transform T2:Weight=0.36;
Variations tab:linear=0;foci=0.578;pre_sinusoidal=0.422
Colors tab:Transform color=1;Color speed=0;
Adjustment window で。Scale=15;
Rendering tab:Gamma=4;Brightness=10;
Gradient tabで色番号276を選択。;
Display Density の値を大きくすると綺麗になります。
(ただ、再描画に時間はかかります。)
以上で下図のような画像となります。
TO Menu
(37) circular grand julian から:
参照した tutorial はこちら です。
New flame T1:Weight=0.1;
Variations tab:linear=0;blur=0.25;
Colors tab:Transform color=0;Color speed=0;
New transform T2:Weight=3;
Variations tab:linear=0;julian=1.25;
Variables tab:julian_power=2;julian_dist=-1;
Triangle tab:1.3右へ;
Colors tab:Transform color=0.333;Color speed=0;
New transform T3:Weight=1;
Variations tab:linear=0;julian=0.25;
Variables tab:julian_power=7;julian_dist=-2;
Colors tab:Transform color=0.667;Color speed=0;
New transform T4:Weight=1;
Variations tab:linear=0;julian=0.5;
Variables tab:julian_power=5;julian_dist=-1;
Colors tab:Transform color=1;Color speed=0;
Adjustment window で。Scale=10;
Rendering tab:Gamma=3;Brightness=20;
Gradient tabで色番号097を選択。;
Display Density の値を大きくすると綺麗になります。
(ただ、再描画に時間はかかります。)
以上で下図のような画像となります。
TO Menu
(38) starter flames ⅳ から:
参照した flame pack はこちら です。
New flame T1:Weight=0.5;
Variations tab:linear=0;blur=0.2;
Colors tab:Transform color=0;Color speed=0;
New transform T2:Weight=2;
Variations tab:linear=0;julian=1;
Variables tab:julian_power=2;julian_dist=-1;
Triangle tab:45°反時計回り。;0.3上へ;
Colors tab:Transform color=1;Color speed=0;
New transform T3:Weight=1;
Variations tab:linear=0;julian=0.2;
Variables tab:julian_power=15;julian_dist=-1;
Triangle tab:45°反時計回り。;
Colors tab:Transform color=0;Color speed=0;
New transform T4:Weight=1;
Variations tab:linear=0;julian=0.3;
Variables tab:julian_power=8;julian_dist=-1;
Triangle tab:45°反時計回り。;
Colors tab:Transform color=0;Color speed=0;
New transform T5:Weight=1;
Variations tab:linear=0;julian=0.35;
Variables tab:julian_power=20;julian_dist=1;
Triangle tab:45°反時計回り。;
Colors tab:Transform color=0;Color speed=0;
Adjustment window で。Scale=10;
Camera tab:Rotation=-45;
Rendering tab:Gamma=3;Brightness=20;
Gradient tabで色番号072を選択。;
Display Density の値を大きくすると綺麗になります。
(ただ、再描画に時間はかかります。)
以上で下図のような画像となります。
TO Menu
(39) Tutorial Julian Flame から:
参照した tutorial はこちら です。
New flame T1:Weight=1.5;
Variations tab:linear=0;swirl=0.1;disc=0.1;gaussian_blur=0.1;
Colors tab:Transform color=0.351;Color speed=0;
New transform T2:Weight=8;
Variations tab:linear=0;julian=2;
Variables tab:julian_power=2;julian_dist=-1;
Triangle tab:45°反時計回り。;0.6上へ;125で 3回拡大;
Colors tab:Transform color=0.896;Color speed=0;
New transform T3:Weight=3;
Variations tab:linear=0;julian=0.4;
Variables tab:julian_power=20;julian_dist=-2;
Triangle tab:45°反時計回り。;
Colors tab:Transform color=0.429;Color speed=0;
New transform T4:Weight=3;
Variations tab:linear=0;julian=0.3;
Variables tab:julian_power=10;julian_dist=2;
Triangle tab:45°反時計回り。;
Colors tab:Transform color=0;Color speed=0;
New transform T5:Weight=5;
Variations tab:linear=0;julian=2;
Variables tab:julian_power=2;julian_dist=-1;
Triangle tab:45°反時計回り。;6.6上へ;125で 3回拡大;
Colors tab:Transform color=0.052;Color speed=0;
Adjustment window で。Scale=30;
Camera tab:Zoom=-1;Rotation=45;
Rendering tab:Gamma=3;Brightness=10;
Gradient tabで色番号311を選択。;
Display Density の値を大きくすると綺麗になります。
(ただ、再描画に時間はかかります。)
以上で下図のような画像となります。
TO Menu
(40) Tutorial Julian Flame から:
参照した tutorial は(39)と同じです。
New flame T1:Weight=0.5;
Variations tab:linear=0;swirl=0.1;disc=0.1;blur=0.1;
Colors tab:Transform color=0.704;Color speed=0;
New transform T2:Weight=5;
Variations tab:linear=0;julian=1;
Variables tab:julian_power=2;julian_dist=-1;
Triangle tab:45°反時計回り。;1.05上へ;
Colors tab:Transform color=0.897;Color speed=0.2;
New transform T3:Weight=1;
Variations tab:linear=0;julian=0.25;
Variables tab:julian_power=50;julian_dist=10;
Triangle tab:45°時計回り。;
Colors tab:Transform color=0.63;Color speed=0;
New transform T4:Weight=1;
Variations tab:linear=0;julian=0.5;
Variables tab:julian_power=20;julian_dist=2;
Triangle tab:45°時計回り。;
Colors tab:Transform color=0.28;Color speed=0;
New transform T5:Weight=0.5;
Variations tab:linear=0;julian=0.1;
Variables tab:julian_power=8;julian_dist=-5;
Colors tab:Transform color=0.24;Color speed=0.3;
Adjustment window で。Scale=20;
Camera tab:Rotation=-45;
Rendering tab:Gamma=4;Brightness=4;
Gradient tabで色番号142を選択。;
Display Density の値を大きくすると綺麗になります。
(ただ、再描画に時間はかかります。)
以上で下図のような画像となります。
TO Menu
(41)Tutorial Flower Flames から:
参照した Tutorial は(39)と同じです。
New flame T1:Weight=0.5;
Variations tab:linear=0;Gaussian_blur=0.5;
Colors tab:Transform color=0;Color speed=0.5;
New transform T2:Weight=20;
Variations tab:linear=0.9;spherical=0.02;polar2=0.05;
cross=0.015;waves2=0.1
Variables tab:waves2{3,3,0,1.5,1.5,0};
Colors tab:Transform color=0.2;Color speed=0.9;
Triangle tab:125で1回拡大;105度反時計回り;
0.41上へ移動;0.66右へ移動;
New transform T3:Weight=1.5;
Variations tab:linear=0;epispiral=0.05;
Variables tab:epispiral{10,1,1};
Colors tab:Transform color=0;Color speed=0;
Enable final transform Fx:
Variations tab:linear=0;julian=1;
Variables tab:julian{-2,1};
Colors tab:Transform color=0;Color speed=0;
Adjustment window で。Scale=25;
Rendering tab:Gamma=3;Brightness=4;
Gradient tabで色番号097を選択。;
Display Density の値を大きくすると綺麗になります。
(ただ、再描画に時間はかかります。)
以上で下図のような画像となります。
TO Menu
(42)pre_falloff2などを使って:
参照したものはありません。
New flame T1:Weight=0.8;
Variations tab:linear=0;julian=1;pre_falloff2=0.135;
Variables tab:julian{5,1};pre_falloff2{1,0.5,1,1,0,0,0,0,0,0,0};
Triangle tab:90度反時計回り;0.42下へ移動。0.24右へ移動。
Colors tab:Transform color=0.02;Color speed=0;
New transform T2:Weight=0.5;
Variations tab:linear=0;fan2=0.004;lazysusan=1
Variables tab:fan2{0.2,0.6};lazysusan{3,0,0,0,0}
Colors tab:Transform color=0.71;Color speed=0;
Triangle tab:125で1回縮小;140度反時計回り;
Adjustment window で。Scale=50;
Rendering tab:Gamma=4;Brightness=4;
Gradient tabで色番号241を選択。;
Display Density の値を大きくすると綺麗になります。
(ただ、再描画に時間はかかります。)
以上で下図のような画像となります。
TO Menu
(43)pre_falloff2などを使って:
参照したものはありません。(42)とほぼ同じです。
New flame T1:Weight=0.4;
Variations tab:linear=0;julian=0.86;pre_falloff2=0.135;
Variables tab:julian{4,1};pre_falloff2{1,0.5,1,1,0,0,0,0,0,0,0};
Triangle tab:95度反時計回り;0.42下へ移動。0.24右へ移動。
Colors tab:Transform color=0;Color speed=0;
New transform T2:Weight=0.5;
Variations tab:linear=0;fan2=0.0034;lazysusan=1
Variables tab:fan2{0.2,0.6};lazysusan{3.14159,0,0,0,0}
Colors tab:Transform color=0.51;Color speed=0;
Triangle tab:125で1回縮小;140度反時計回り;
Adjustment window で。Scale=60;
Rendering tab:Gamma=4;Brightness=4;
Gradient tabで色番号224を選択。;
Display Density の値を大きくすると綺麗になります。
(ただ、再描画に時間はかかります。)
以上で下図のような画像となります。
TO Menu
(44)flattenなどを使って:
参照したものはありません。
New flame T1:Weight=0.5;
Variations tab:linear=0;julian=0.8
Variables tab:julian{10,1}
Colors tab:Transform color=0.3;Color speed=0
New transform T2:Weight=3;
Variations tab:linear=2.6;
Colors tab:Transform color=0.88;Color speed=0
Triangle tab:125で2回縮小;055上へ移動;0.57右へ移動
New transform T3:Weight=0.5;
Variations tab:linear=0;flatten=1;polar=1;bubble=2;pre_blue=2
Triangle tab:45度反時計回り。
Colors tab:Transform color=0.23;Color speed=0;
Enable final transform Fx:
Variations tab:linear=0;julian=0.5;
Variables tab:julian{10,1};
Triangle tab:125で1回縮小;033上へ移動;0.52右へ移動
Colors tab:Transform color=0.84;Color speed=1;
Adjustment window で。Scale=20;
Rendering tab:Gamma=4;Brightness=4;
Gradient tabで色番号150を選択。;
Display Density の値を大きくすると綺麗になります。
(ただ、再描画に時間はかかります。)
以上で下図のような画像となります。
TO Menu
(45)flattenなどを使って:
参照したものはありません。(44)とほぼ同じで色違いです。
New flame T1:Weight=0.5;
Variations tab:linear=0;julian=0.8
Variables tab:julian{10,1}
Colors tab:Transform color=0.84;Color speed=0
New transform T2:Weight=3;
Variations tab:linear=2.677;
Colors tab:Transform color=0.55;Color speed=0
Triangle tab:125で2回縮小;055上へ移動;0.57右へ移動
New transform T3:Weight=0.5;
Variations tab:linear=0;flatten=1;polar=1;bubble=2;pre_blue=2
Triangle tab:45度反時計回り。
Colors tab:Transform color=0.23;Color speed=0;
Enable final transform Fx:
Variations tab:linear=0;julian=0.5;
Variables tab:julian{10,1};
Triangle tab:125で1回縮小;033上へ移動;0.53右へ移動
Colors tab:Transform color=0.84;Color speed=1;
Adjustment window で。Scale=25;
Rendering tab:Gamma=4;Brightness=50;
Gradient tabで色番号150を選択。;
Display Density の値を大きくすると綺麗になります。
(ただ、再描画に時間はかかります。)
以上で下図のような画像となります。
TO Menu
(46)Tutorial Flower Flames から:
参照した Tutorial は(39)と同じ。
New flame T1:Weight=0.9;
Variations tab:linear=1;spherical=0.2;cross=0.1;wedge=0.001;waves2=0.035
Variables tab:wedge{1.5708,0,2,0};waves2{5,1,0,5,5,0}
Triangle tab: x:[1,0];y:[0.862121,1.57533];o:[0,0]と入力。
125で1回拡大;80度で時計回り。;1.02上へ移動;0.29左へ移動。
Colors tab:Transform color=0;Color speed=0.75132;
Xaos:(View as "to")Weight modifier値{1,1.1828,0.0349};
New transform T2:Weight=0.15;
Variations tab:linear=0;flatten=1;blur=0.5;gaussian_blur=0.3
Triangle tab:200で2回縮小
Colors tab:Transform color=0.5;Color speed=0.5
Xaos:(View as "to")Weight modifier値{1,1,0.9536}
New transform T3:Weight=0.024;
Variations tab:linear=0;flatten=1;spherical=6.7
Colors tab:Transform color=1;Color speed=1;
Xaos:(View as "to")Weight modifier値{0,1.967,1}
Enable final transform Fx:
Variations tab:linear=0;flatten=1;pre_blur=0.07;julian2=1
Variables tab:julian2{2,-0.72,1,0,0,1,0,0};
Triangle tab:110で4回縮小;0.05下へ移動;0.4左へ移動
Colors tab:Transform color=0.915;Color speed=0.831662;
Adjustment window で。Scale=30;
Rendering tab:Gamma=1.7;Brightness=1.92;
Gradient tabで色番号097を選択。;
Display Density の値を大きくすると綺麗になります。
(ただ、再描画に時間はかかります。)
以上で下図のような画像となります。
TO Menu
(47)julian-rings2 から:
参照した Tutorial は(15)と同じです。
New flame T1:Weight=1;
Variations tab:linear=0;sinusoidal=0.05;julian=1;
Variables tab:julian_power=5000;julian_dist=1;
Triangle tab:125で2回縮小;45度反時計回り;0.2下へ移動;
0.8右へ移動
Colors tab:Transform color=0.8;Color speed=-0.9;
New transform T2:Weight=3;
Variations tab:linear=0;rings2=1;
Variables tab:rings2_val=-1;
Triangle tab:90度反時計回り;1.28下へ移動。
Colors tab:Transform color=0.45;Color speed=0;
Enable final transform Fx:
Variations tab:linear=0;juliascope=1;
Variables tab:juliascope_power=2;juliascope_dist=1;
Triangle tab:0.72下へ移動。;
Adjustment window で。Scale=25;
Camera tab で Rotation=180;
Rendering tab:Gamma=3;Brightness=5;
Gradient tabで色番号099を選択。;
Display Density の値を大きくすると綺麗になります。
(ただ、再描画に時間はかかります。)
以上で下図のような画像となります。
TO Menu
(48)julian-rings2 から:
参照した Tutorial は(15)と同じです。
New flame T1:Weight=1;
Variations tab:linear=0;sinusoidal=0.05;julian=1;
Variables tab:julian_power=6500;julian_dist=1;
Triangle tab:125で2回縮小;45度反時計回り;0.2下へ移動;
0.8右へ移動
Colors tab:Transform color=0.45;Color speed=0;
New transform T2:Weight=1;
Variations tab:linear=0;rings2=1;
Variables tab:rings2_val=-1;
Triangle tab:y座標に[0.5,0.866123]値を入力;125で2回拡大;
60度反時計回り;
Colors tab:Transform color=0.71;Color speed=0.4;
Enable final transform Fx:
Variations tab:linear=0;juliascope=1;
Variables tab:juliascope_power=2;juliascope_dist=1;
Triangle tab:0.72下へ移動。;
Adjustment window で。Scale=25;
Camera tab で Rotation=180;
Rendering tab:Gamma=3;Brightness=15;
Gradient tabで色番号368を選択。;
Display Density の値を大きくすると綺麗になります。
(ただ、再描画に時間はかかります。)
以上で下図のような画像となります。
TO Menu
(49)pre_falloff2,fan2などを使って:
参照したものはありません。(42)とほぼ同じです。
New flame T1:Weight=0.8;
Variations tab:linear=0;julian=1;pre_falloff2=0.135;
Variables tab:julian{5,1};pre_falloff2{1,0,5,1,1,0,0,0,0,0,0,0}
Triangle tab:90度反時計回り。0.42下へ移動;0.24右へ移動;
Colors tab:Transform color=0.2;Color speed=0;
New transform T2:Weight=0.5;
Variations tab:linear=0;fan2=0.004;lazysuan=1;
Variables tab:fan2{0.2,0.6};lazysuan{3.14159,0,0,0,0}
Colors tab:Transform color=0.53;Color speed=0;
Triangle tab:125で2回拡大;
Adjustment window で。Scale=20;
Rendering tab:Gamma=4;Brightness=4;
Gradient tabで色番号276を選択。;
Display Density の値を大きくすると綺麗になります。
(ただ、再描画に時間はかかります。)
以上で下図のような画像となります。
TO Menu
(50)horshoeなどを使って:
参照したものはありません。
New flame T1:Weight=0.5;
Variations tab:linear=0;horshoe=0.738;blur_zoom=0.261;
Variables tab:blur_zoom{0,0,0};
Triangle tab:125で1回縮小;20度時計回り。0.45上へ移動;0.42右へ移動;
Colors tab:Transform color=0;Color speed=0;
New transform T2:Weight=0.46;
Variations tab:linear=0;pdj=0.708;auger=0.291;
Variables tab:pdj{-1.45,1.22,-2.87,-0.88};auger{0,0.5,0.1,0}
Colors tab:Transform color=1;Color speed=0;
Triangle tab:30度反時計回り。0.85下へ移動;0.94右へ移動;
Adjustment window で。Scale=28;
Camera tab:x-Position:-0.577;y-Position:-0.421;
Rendering tab:Gamma=4;Brightness=4;
Gradient tabで色番号562を選択。;
Display Density の値を大きくすると綺麗になります。
(ただ、再描画に時間はかかります。)
以上で下図のような画像となります。
TO Menu
(51)rings2などを使って:
参照したものはありません。
New flame T1:Weight=0.35;
Variations tab:linear=0;julia3D=0.6;post_falloff2=0.4;
Variables tab:julia3D{-3};post_falloff2{1,0.5,1,1,0,0,0,0,0,0,0}
Triangle tab:125で5回縮小。
Colors tab:Transform color=0.31;Color speed=0;
New transform T2:Weight=0.3;
Variations tab:linear=0;rings2=0.02;juliascope=1;
Variables tab:rings2{1.1};juliascope{6,1}
Colors tab:Transform color=0.62;Color speed=0;
Triangle tab:125で4回縮小。;Flip horizontal(左右反転)。;95度反時計回り。;0.14上へ移動;0.06右へ移動;
Adjustment window で。Scale=35;
Rendering tab:Gamma=3;Brightness=4;
Gradient tabで色番号097を選択。;
Display Density の値を大きくすると綺麗になります。
(ただ、再描画に時間はかかります。)
以上で下図のような画像となります。
TO Menu
(52)pre_blurなどを使って:
参照したものはありません。
New flame T1:Weight=0.5;
Variations tab:linear=0;pre_blur=1;julian=0.24;
juliascope=0.12
Variables tab:julian{16,1};juliascope{8,1}
Colors tab:Transform color=0;Color speed=0;
New transform T2:Weight=0.25;
Variations tab:linear=0;bubble=0.1;pre_blur=0.6;
Colors tab:Transform color=0.13;Color speed=-1;
New flame T3:Weight=0.5;
Variations tab:linear=0;julian=0.64;
Variables tab:julian{-4,1};
Triangle tab:0.8上へ移動
Colors tab:Transform color=0;Color speed=0;
New transform T4:Weight=0.5;
Variations tab:linear=0;julian=1.1;
Variables tab:julian{4,1};
Triangle tab:0.8上へ移動
Colors tab:Transform color=0.49;Color speed=0;
Adjustment window で。Scale=22;
Rendering tab:Gamma=2;Brightness=4;
Gradient tabで色番号601を選択。;
Display Density の値を大きくすると綺麗になります。
(ただ、再描画に時間はかかります。)
以上で下図のような画像となります。
TO Menu
(53)zconeなどを使って:
参照したtutorialなどはありません。
Editor window で。
New flame T1:Weight=0.5;
Variations tab:linear=0;zcone=0.3;eliptic=0.7;
Triangle tab:125で1回縮小;90度反時計回り;0.1上へ移動
Colors tab:Transform color=0.51;Color speed=0;
New transform T2:Weight=0.5;
Variations tab:linear=0;julian=1
Variables tab:julian{8,-1}
Colors tab:Transform color=0.05;Color speed=0.1;
Triangle tab:125で3回拡大
Adjustment window で。Scale=20;
Rendering tab:Gamma=3;Brightness=10;
Gradient tabで色番号162を選択。;
Display Density の値を大きくすると綺麗になります。
(ただ、再描画に時間はかかります。)
以上で下図のような画像となります。
TO Menu
(54)blurなどを使って:
参考にしたtutorialは(37)と同じです。
Editor window で。
New flame T1:Weight=0.1;
Variations tab:linear=0;blur=0.25;
Colors tab:Transform color=0;Color speed=0;
New transform T2:Weight=3;
Variations tab:linear=0;julian=1.25;
Variables tab:julian_power=2;julian_dist=-1;
Triangle tab:1.3右へ;
Colors tab:Transform color=0.333;Color speed=0;
New transform T3:Weight=1;
Variations tab:linear=0;julian=0.25;
Variables tab:julian_power=7;julian_dist=-2;
Colors tab:Transform color=0.667;Color speed=0;
New transform T4:Weight=1;
Variations tab:linear=0;julian=0.5;
Variables tab:julian_power=5;julian_dist=-1;
Colors tab:Transform color=1;Color speed=0;
New transform T5:Weight=1;
Variations tab:linear=0;julian=5;
Variables tab:julian_power=16;julian_dist=1;
Colors tab:Transform color=0.20;Color speed=0;
Adjustment window で。Scale=7;
Rendering tab:Gamma=7;Brightness=70;
Gradient tabで色番号099を選択。;
Display Density の値を大きくすると綺麗になります。
(ただ、再描画に時間はかかります。)
以上で下図のような画像となります。
TO Menu
(55)zconeなどを使って:
参照したtutorialなどはありません。
Editor window で。
New flame T1:Weight=0.5;
Variations tab:linear=0;zcone=0.3;eliptic=0.7;
Triangle tab:91度反時計回り
Colors tab:Transform color=0.77;Color speed=0.3;
New transform T2:Weight=0.2;
Variations tab:linear=0;julian=1
Variables tab:julian{5,-1}
Colors tab:Transform color=0.17;Color speed=0;
Triangle tab:125で32回縮小
Adjustment window で。Scale=8;
Rendering tab:Gamma=3;Brightness=20;
Gradient tabで色番号358を選択。;
Display Density の値を大きくすると綺麗になります。
(ただ、再描画に時間はかかります。)
以上で下図のような画像となります。
TO Menu
(56)loonieなどを使って:
参照したtutorialなどはありません。
Editor window で。
New flame T1:Weight=0.5;
Variations tab:linear=0;zcone=0.3;flatten=0.15;loonie=0.85
Colors tab:Transform color=0;Color speed=0;
New transform T2:Weight=0.5;
Variations tab:linear=0;julia3Dz=0.95;curl3D=0.05
Variables tab:julia3Dz{-6};curl3D{0,0,0}
Colors tab:Transform color=1;Color speed=0;
Adjustment window で。Scale=23;
Rendering tab:Gamma=3;Brightness=10;
Gradient tabで色番号255を選択。;
Display Density の値を大きくすると綺麗になります。
(ただ、再描画に時間はかかります。)
以上で下図のような画像となります。
TO Menu
(57)loonieなどを使って:
参照したtutorialなどはありません。
Editor window で。
New flame T1:Weight=0.5;
Variations tab:linear=0;zcone=0.3;flatten=0.15;loonie=0.85
Triangle tab:125で1回縮小さらに110で1回縮小;24度反時計回り;0.04上へ移動
Colors tab:Transform color=0;Color speed=0;
New transform T2:Weight=0.5;
Variations tab:linear=0;julia3Dz=0.95;curl3D=0.05
Variables tab:julia3Dz{-6};curl3D{0,0,0}
Triangle tab:125で2回縮小さらに110で1回縮小;173度反時計回り;0.25右へ移動
Colors tab:Transform color=1;Color speed=0;
Adjustment window で。Scale=20;
Rendering tab:Gamma=3;Brightness=10;
Gradient tabで色番号255を選択。;
Display Density の値を大きくすると綺麗になります。
(ただ、再描画に時間はかかります。)
以上で下図のような画像となります。
TO Menu
(58)scryなどを使って:
参照したものはありません。
New flame T1:Weight=0.5;
Variations tab:linear=0;bubble=0.0939718;scry=0.906028;
Triangle tab:170度反時計回り。0.28上へ移動、0.02右へ移動。
Colors tab:Transform color=0;Color speed=0;
New transform T2:Weight=0.5;
Variations tab:linear=0;julia3Dz=0.69346;fod=0.30654;
Variables tab:julia3Dz{3}
Colors tab:Transform color=1;Color speed=0;
Triangle tab:(150で2回+125で1回)縮小。142度時計回り。;0.68下へ移動;0.29左へ移動;
Adjustment window で。Scale=25;
Camera tab:x-Position:-0.5;y-Position:0.3;
Rendering tab:Gamma=4;Brightness=4;
Gradient tabで色番号119を選択。;
Display Density の値を大きくすると綺麗になります。
(ただ、再描画に時間はかかります。)
以上で下図のような画像となります。
TO Menu
(59)diamondなどを使って:
参照したものはありません。
New flame T1:Weight=0.5;
Variations tab:linear=0;diamond=0.373;epispiral=0.626;
Variables tab:epispiral{6,0,1}
Triangle tab:125で1回縮小。10度時計回り。0.38下へ移動、0.12左へ移動。
Colors tab:Transform color=0;Color speed=0;
New transform T2:Weight=0.5;
Variations tab:linear=0;cross=0.262;falloff2=0.737;
Variables tab:falloff2{1,0.5,1,1,0,0,0,0,0,0,0}
Colors tab:Transform color=1;Color speed=0;
Triangle tab:125で1回縮小。47度時計回り。;0.08上へ移動;0.06左へ移動;
Adjustment window で。Scale=20;
Camera tab:x-Position:-0.5;y-Position:0.3;
Rendering tab:Gamma=3;Brightness=10;
Gradient tabで色番号472を選択。;
Display Density の値を大きくすると綺麗になります。
(ただ、再描画に時間はかかります。)
以上で下図のような画像となります。
TO Menu
(60)julianなどを使って:
参照したtutorialは(15)と同じ。
Editor window で。
New flame T1:Weight=0.5;
Variations tab:linear=0;flatten=1;pre_blur=5;julian=1;
Variables tab:julian{6500,1};
Triangle tab:0.6上へ移動、0.07左へ移動。
Colors tab:Transform color=0;Color speed=0;
New transform T2:Weight=0.5;
Variations tab:linear=0;flatten=1;rings2=1
Variables tab:rings2{-1};
Triangle tab:0.22下へ移動、0.0.58左へ移動。
Colors tab:Transform color=0.39;Color speed=0;
Adjustment window で。Scale=30;
Rendering tab:Gamma=3;Brightness=4;
Gradient tabで色番号113を選択。;
Display Density の値を大きくすると綺麗になります。
(ただ、再描画に時間はかかります。)
以上で下図のような画像となります。
TO Menu
(61)ellipticなどを使って:
参照したものはありません。
Editor window で。
New flame T1:Weight=20;
Variations tab:linear=0;elliptic=1
Colors tab:Transform color=0.77;Color speed=0;
New transform T2:Weight=30;
Variations tab:linear=1;splits=1
Variables tab:splits{1,0.099};
Triangle tab:110で1回縮小、90度反時計回り
Colors tab:Transform color=0.32;Color speed=0;
New transform T3:Weight=0.5;
Variations tab:linear=0;cylinder=0.5;pre_blue=2
Colors tab:Transform color=0.81;Color speed=0;
Adjustment window で。Scale=10;
Rendering tab:Gamma=4;Brightness=30;
Gradient tabで色番号152を選択。;
Display Density の値を大きくすると綺麗になります。
(ただ、再描画に時間はかかります。)
以上で下図のような画像となります。
TO Menu
(62)hyperblicなどを使って:
参照したものはありません。
Editor window で。
New flame T1:Weight=0.5;
Variations tab:linear=0;hyperblic=0.95;Blur_cirde=0.05
Triangle tab:125で2回縮小、100度時計回り、右へ0.42、下へ0.65移動
Colors tab:Transform color=0;Color speed=1;
New transform T2:Weight=0.5;
Variations tab:linear=0;bubble=0.21;murl=0.79
Variables tab:murl{0,2};
Triangle tab:110で11回縮小、47度時計回り、右へ0.63、上へ0.85移動
Colors tab:Transform color=1;Color speed=0;
New transform T3:Weight=1;
Variations tab:linear=1
Triangle tab:左右反転(Flip horizontal)
Colors tab:Transform color=1;Color speed=1;
Adjustment window で。Scale=20;
Rendering tab:Gamma=4;Brightness=4;
Gradient tabで色番号367を選択。;
Display Density の値を大きくすると綺麗になります。
(ただ、再描画に時間はかかります。)
以上で下図のような画像となります。
TO Menu
(63)julia3Dなどを使って:
参照したものはありません。
New flame T1:Weight=0.6;
Variations tab:linear=0;julia3D=0.168;waves2=0.831;
Variables tab:julia3D{-3};waves2{2,2,0,1,1,0}
Triangle tab:125で1回縮小;150度反時計回り。0.45下へ移動;0.65右へ移動;
Colors tab:Transform color=0.39;Color speed=0;
New transform T2:Weight=0.4;
Variations tab:linear=0;blur3D=0.379;blur_pixelize=0.62;
Variables tab:blur_pixelize{0.1,1};
Colors tab:Transform color=0.5;Color speed=0;
Triangle tab:110で4回縮小、135度反時計回り。0.98下へ移動;0.7右へ移動;
Adjustment window で。Scale=27;
Camera tab:x-Position:0.32;y-Position:0.92;
Rendering tab:Gamma=4;Brightness=5;
Gradient tabで色番号601を選択。;
Display Density の値を大きくすると綺麗になります。
(ただ、再描画に時間はかかります。)
以上で下図のような画像となります。
TO Menu
(64)pre_bwapsなどを使って:
参照したものはありません。
New flame T1:Weight=100;
Variations tab:linear=0;pre_bwaps=0.756;glynnia=0.243;
Variables tab:jpre_bwaps{1,0,1,0,0}
Triangle tab:110で2回縮小;125度時計回り。0.76上へ移動;0.25右へ移動;
Colors tab:Transform color=0.94;Color speed=1;
New transform T2:Weight=1000;
Variations tab:linear=0;waves2=0.265;ex=0.734
Variables tab:waves2{2,2,0,1,1,0};
Colors tab:Transform color=0.87;Color speed=0;
Triangle tab:110で5回縮小、上下反転、60度反時計回り。
0.8上へ移動;0.76左へ移動;
New transform T3:Weight=1000;
Variations tab:linear=1;
Colors tab:Transform color=0.23;Color speed=0;
Triangle tab:左右反転
Adjustment window で。Scale=20;
Rendering tab:Gamma=4;Brightness=4;
Gradient tabで色番号101を選択。;
Display Density の値を大きくすると綺麗になります。
(ただ、再描画に時間はかかります。)
以上で下図のような画像となります。
TO Menu
(65)post_curlなどを使って:
参照したものはありません。
New flame T1:Weight=0.3;
Variations tab:linear=0;post_curl=0.76;blur_linear=0.23;
Variables tab:post_curl{0,0};blur_linere{0,0}
Triangle tab:110で2回縮小;67度反時計回り。0.5下へ移動;0.02左へ移動;
Colors tab:Transform color=0;Color speed=0;
New transform T2:Weight=0.1;
Variations tab:linear=0;swirl=0.11;mobius=0.88
Variables tab:mobius{1,0,0,0,0,0,1,0};
Colors tab:Transform color=0.5;Color speed=0;
Triangle tab:110で16回縮小、80度反時計回り。
0.5下へ移動;0.38左へ移動;
New transform T3:Weight=0.5;
Variations tab:linear=0;curl=0.99;separation=0.01
Variables tab:curl{0,0};separation{1,1,0,0}
Colors tab:Transform color=1;Color speed=0;
Triangle tab:59度反時計回り。0.4上へ移動;0.83左へ移動;
Adjustment window で。Scale=20;
Camera tab:x-Position:-0.7;y-Position:0.5,Rotatio:7
Rendering tab:Gamma=4;Brightness=4;
Gradient tabで色番号101を選択。;
Display Density の値を大きくすると綺麗になります。
(ただ、再描画に時間はかかります。)
以上で下図のような画像となります。
TO Menu
(66)esyerなどを使って:
参照したものはありません。
New flame T1:Weight=0.3;
Variations tab:linear=0;esher=0.93;post_bwaps=0.065;
Variables tab:esher{0};blur_linere{1,0,1,0,0}
Triangle tab:110で11回縮小;
Colors tab:Transform color=0.35;Color speed=0;
New transform T2:Weight=0.3;
Variations tab:linear=0;rings2=0.46;julian=0.539
Variables tab:rings2{0.8};julian{4,1};
Colors tab:Transform color=0.204;Color speed=0;
Triangle tab:110で2回縮小、30度時計回り。
0.6下へ移動;0.6左へ移動;
New transform T3:Weight=1;
Variations tab:linear=1;
Colors tab:Transform color=0.56;Color speed=1;
Triangle tab:90度時計回り。0.25上へ移動;0.32右へ移動;
Adjustment window で。Scale=50;
Camera tab:x-Position:0.2;y-Position:0.05;
Rendering tab:Gamma=4;Brightness=4;
Gradient tabで色番号619を選択。;
Display Density の値を大きくすると綺麗になります。
(ただ、再描画に時間はかかります。)
以上で下図のような画像となります。
TO Menu
(67)sphericalなどを使って:
参照したものはありません。
New flame T1:Weight=0.1;
Variations tab:linear=0;spherical=0.06;fan2=0.93;
Variables tab:fan2{0.14,0.78};
Triangle tab:110で3回縮小;11度反時計回り。0.47上へ移動;0.18右へ移動;
Colors tab:Transform color=0.23;Color speed=0;
New transform T2:Weight=0.38;
Variations tab:linear=0;epispiral=0.96;curl3D=0.4
Variables tab:epispiral{6,0,1};curl3D{0,0,0};
Colors tab:Transform color=0.09;Color speed=0;
Triangle tab:110で9回縮小、102度反時計回り。
0.3上へ移動;0.1左へ移動;
New transform T3:Weight=1;
Variations tab:linear=1;
Colors tab:Transform color=0.02;Color speed=1;
Triangle tab:120度時計回り。
Adjustment window で。Scale=28;
Rendering tab:Gamma=4;Brightness=4;
Gradient tabで色番号456を選択。;
Display Density の値を大きくすると綺麗になります。
(ただ、再描画に時間はかかります。)
以上で下図のような画像となります。
TO Menu
(68)blur_zoomなどを使って:
参照したものはありません。
New flame T1:Weight=0.5;
Variations tab:linear=0;blur_zoom=1;
Variables tab:blur_zoom{0,0,0}
Triangle tab:125で2回縮小;35度時計回り。0.01下へ移動;0.03左へ移動;
Colors tab:Transform color=0;Color speed=0;
New transform T2:Weight=0.5;
Variations tab:linear=0;julian=3;
Variables tab:julian{6,-1};
Colors tab:Transform color=0;Color speed=0;
New transform T3:Weight=0.5;
Variations tab:linear=0;julian=1;
Variables tab:julian{6,-1};
Colors tab:Transform color=0.76;Color speed=0;
Triangle tab:90度時計回り。2.6上へ移動;
Adjustment window で。Scale=9;
Rendering tab:Gamma=4;Brightness=7;
Gradient tabで色番号249を選択。;
Display Density の値を大きくすると綺麗になります。
(ただ、再描画に時間はかかります。)
以上で下図のような画像となります。
TO Menu
(69)blur_zoomなどを使って:
前の68とほぼ同じ。
New flame T1:Weight=0.4;
Variations tab:linear=0;blur_zoom=1;
Variables tab:blur_zoom{0,0,0}
Triangle tab:110で19回縮小;0.01下へ移動;0.01左へ移動;
Colors tab:Transform color=0.29;Color speed=0;
New transform T2:Weight=0.5;
Variations tab:linear=0;julian=3;
Variables tab:julian{6,-1};
Triangle tab:110で33回拡大;0.7上へ移動;
Colors tab:Transform color=0;Color speed=0;
New transform T3:Weight=0.5;
Variations tab:linear=0;julian=1;
Variables tab:julian{6,-1};
Colors tab:Transform color=0.76;Color speed=0;
Triangle tab:90度時計回り。2.6上へ移動;
Adjustment window で。Scale=10;
Rendering tab:Gamma=4;Brightness=4;
Gradient tabで色番号356を選択。;
Display Density の値を大きくすると綺麗になります。
(ただ、再描画に時間はかかります。)
以上で下図のような画像となります。
TO Menu
(70)wedgeなどを使って:
参照したものはありません。
New flame T1:Weight=0.5;
Variations tab:linear=0;julian=2;
Variables tab:julian{2,-1}
Triangle tab:125で3回拡大;45度反時計回り。0.6上へ移動
Colors tab:Transform color=0.35;Color speed=0;
New transform T2:Weight=0.5;
Variations tab:linear=0;julian=0.4;
Variables tab:julian{20,-2};
Triangle tab:45度時計回り。
Colors tab:Transform color=0.41;Color speed=0;
New transform T3:Weight=0.5;
Variations tab:linear=1;wedge=1;
Variables tab:wedge{1.5,0,2,0};
Colors tab:Transform color=0.8;Color speed=0;
Adjustment window で。Scale=10;
Rendering tab:Gamma=4;Brightness=4;
Gradient tabで色番号694を選択。;
Display Density の値を大きくすると綺麗になります。
(ただ、再描画に時間はかかります。)
以上で下図のような画像となります。
TO Menu
(71)sphericalなどを使って
参照したものはありません。
New flame T1:Weight=1;
Variations tab:linear=0;spherical=1
Triangle tab: x:[1,0];y:[0.862121,1.57533];o:[0,0]と入力。
90度で時計回り。;1で右へ移動。
Colors tab:Transform color=0.3;Color speed=0;
New transform T2:Weight=7;
Variations tab:linear=0;spherical=1
Triangle tab:90度で反時計回り
Colors tab:Transform color=0.77;Color speed=0
New transform T3:Weight=0.5;
Variations tab:linear=1;
Triangle tab:125で1回拡大;90度で時計回り;1下へ移動;10右へ移動
Colors tab:Transform color=0;Color speed=0;
Enable final transform Fx:
Variations tab:linear=0;julian=1
Variables tab:julian{5,1};
Colors tab:Transform color=0;Color speed=1;
Adjustment window で。Scale=20;
Rendering tab:Gamma=4;Brightness=4;
Gradient tabで色番号138を選択。;
Display Density の値を大きくすると綺麗になります。
(ただ、再描画に時間はかかります。)
以上で下図のような画像となります。
TO Menu
(72)splitsなどを使って
参照したものはありません。
New flame T1:Weight=100;
Variations tab:linear=0;splits=1
Variables tab:splits{0,0.1};
Triangle tab:110で5回縮小、1.5で左へ移動。
Colors tab:Transform color=0;Color speed=0;
New transform T2:Weight=100;
Variations tab:linear=0;splits=1
Variables tab:splits{0,0.1};
Triangle tab:0.7で右へ移動。
Colors tab:Transform color=0.49;Color speed=0
New transform T3:Weight=20;
Variations tab:linear=0;cylinder=0.03;gaussian_blur=0.005;pre_blur=0.5
Triangle tab:0.02下へ移動;0.02右へ移動
Colors tab:Transform color=0;Color speed=1;
Enable final transform Fx:
Variations tab:linear=0;juliascope=1
Variables tab:juliascope{5,3};
Colors tab:Transform color=0;Color speed=1;
Adjustment window で。Scale=18;
Rendering tab:Gamma=4;Brightness=4;
Gradient tabで色番号368を選択。;
Display Density の値を大きくすると綺麗になります。
(ただ、再描画に時間はかかります。)
以上で下図のような画像となります。
TO Menu
(73)hemisphereなどを使って
参照したものはありません。
New flame T1:Weight=0.4;
Variations tab:linear=0;hemisphere=0.711;polar2=0.289
Triangle tab:110で1回縮小、84度で反時計回り、0.4で右へ移動、0.52で下へ移動
Colors tab:Transform color=0;Color speed=0;
New transform T2:Weight=0.5;
Variations tab:linear=0;diamond=0.435;pre_spherical=0.565
Variables tab:splits{0,0.1};
Triangle tab:110で1回縮小、173度で時計回り、0.54で右へ移動、0.26で上へ移動
Colors tab:Transform color=1;Color speed=0
New transform T3:Weight=1;
Variations tab:linear=1;
Triangle tab:左右反転
Colors tab:Transform color=1;Color speed=1;
Adjustment window で。Scale=60;
Camera tab:x-Position:0;y-Position:0.07
Rendering tab:Gamma=4;Brightness=4;
Gradient tabで色番号503を選択。;
Display Density の値を大きくすると綺麗になります。
(ただ、再描画に時間はかかります。)
以上で下図のような画像となります。
TO Menu
(74)blur_zoomなどを使って
参照したものはありません。
New flame T1:Weight=0.7;
Variations tab:linear=0;blur_zoom=0.474;murl2=0.525
Variables tab:blur_zoom{0,0,0};murl2{0,1}
Triangle tab:110で11回縮小、90度で時計回り、0.3で左へ移動、0.42で下へ移動
Colors tab:Transform color=0;Color speed=0;
New transform T2:Weight=0.3;
Variations tab:linear=0;spiral=0.86;modulus=0.13
Triangle tab:左右反転;110で11回縮小、141度で反時計回り、0.51で右へ移動、
0.39で上へ移動
Colors tab:Transform color=1;Color speed=0
Adjustment window で。Scale=35;
Camera tab:x-Position:-0.2;y-Position:0.1
Rendering tab:Gamma=4;Brightness=4;
Gradient tabで色番号114を選択。;
Display Density の値を大きくすると綺麗になります。
(ただ、再描画に時間はかかります。)
以上で下図のような画像となります。
TO Menu
(75)distなどを使って
参照したものはありません。
New flame T1:Weight=0.4;
Variations tab:linear=0;dist=0.95;post_bwraps=0.05
Variables tab:post_bwraps{1,0,0,0,0};
Triangle tab:110で11回縮小、185度で時計回り、3.06で左へ移動、0.22で下へ移動
Colors tab:Transform color=1;Color speed=0;
New transform T2:Weight=0.5;
Variations tab:linear=0;julian=1;
Variables tab:julian{6,3};
Triangle tab:45度で反時計回り、0.019で左へ移動、0.016で上へ移動
Colors tab:Transform color=0;Color speed=0
Adjustment window で。Scale=30;
Rendering tab:Gamma=4;Brightness=4;
Gradient tabで色番号161を選択。;
Display Density の値を大きくすると綺麗になります。
(ただ、再描画に時間はかかります。)
以上で下図のような画像となります。
TO Menu
(76)ellipticなどを使って
参照したものはありません。
New flame T1:Weight=2;
Variations tab:linear=0;elliptic=1;
Triangle tab:110で1回縮小、90度で時計回り
Colors tab:Transform color=0.11;Color speed=0;
New transform T2:Weight=1;
Variations tab:linear=1;splits=1;
Variables tab:splits{1,0.1};
Triangle tab:110で1回縮小、90度で反時計回り
Colors tab:Transform color=0;Color speed=0
New transform T3:Weight=0.1;
Variations tab:linear=0;cylinder=0.075;pre_blur=2
Triangle tab:右へ1移動、上へ0.3移動
Colors tab:Transform color=0.23;Color speed=0
Adjustment window で。Scale=20;
Rendering tab:Gamma=3;Brightness=6;
Gradient tabで色番号368を選択。;
Display Density の値を大きくすると綺麗になります。
(ただ、再描画に時間はかかります。)
以上で下図のような画像となります。
TO Menu
(77)sphericalなどを使って:
参照したものはありません。
New flame T1:Weight=0.5;
Variations tab:linear=0;spherical=1;hyperbolic=0.5;pre_blur=1;rectangle=1
Variables tab:rectangle{1,1};
Colors tab:Transform color=0.35;Color speed=0;
New transform T2:Weight=0.5;
Variations tab:linear=0;bubble=0.5
Colors tab:Transform color=0.44;Color speed=0;
New transform T3:Weight=2;
Variations tab:linear=0;zcone=0.006;julia3D=2
Variables tab:julia3D{-2};
Colors tab:Transform color=0;Color speed=0;
Triangle tab:125で1回拡大;1.0右へ移動;
Adjustment window で。Scale=15;
Rendering tab:Gamma=3;Brightness=20;
Gradient tabで色番号323を選択。;
Display Density の値を大きくすると綺麗になります。
(ただ、再描画に時間はかかります。)
以上で下図のような画像となります。
TO Menu
(78)Apophysis-Starter-Flames-V から:
参照した Tutorial は
こちら です。
New flame T1:Weight=0.5;
Variations tab:linear=0;bubble=1
Triangle tab:上下反転、110で1回縮小、68度で時計回り、0.24で左へ移動、0.2で下へ移動
Colors tab:Transform color=0;Color speed=0;
New transform T2:Weight=0.4;
Variations tab:linear=0;sinusoidal=0.54;spherical=0.45
Triangle tab:110で4回縮小、48度で時計回り、0.48で右へ移動、0.03で上へ移動
Colors tab:Transform color=1;Color speed=0
Adjustment window で。Scale=40;
Camera tab:x-Position:0.5;y-Position:0.5
Rendering tab:Gamma=4;Brightness=4;
Gradient tabで色番号656を選択。;
Display Density の値を大きくすると綺麗になります。
(ただ、再描画に時間はかかります。)
以上で下図のような画像となります。
TO Menu
(79)bubbleなどを使って
参照したものはありません。
New flame T1:Weight=0.5;
Variations tab:linear=0;flatten=1;bubble=0.5;pre_blur=1;rectangles=0.05
Variables tab:rectangles{1,1};
Colors tab:Transform color=0;Color speed=0;
New transform T2:Weight=0.5;
Variations tab:linear=0;julia3D=1
Variables tab:julia3D{-2};
Triangle tab:125で2回拡大、0.2で左へ移動。
Colors tab:Transform color=1;Color speed=0
Enable final transform Fx:
Variations tab:linear=0;juliascope=1
Variables tab:juliascope{-2,1};
Triangle tab:0.6上へ移動;0.2右へ移動
Colors tab:Transform color=0;Color speed=1;
Adjustment window で。Scale=15;
Rendering tab:Gamma=4;Brightness=4;
Gradient tabで色番号368を選択。;
Display Density の値を大きくすると綺麗になります。
(ただ、再描画に時間はかかります。)
以上で下図のような画像となります。
TO Menu
(80)post_cropなどを使って
参照したものはありません。
Editor window で。
New flame T1:Weight=0.3;
Variations tab:linear=0;julian=1;pre_disc=0.18;post_crop=0.81
Variables tab:julian{6,1};post_crop{-1,-1,1,1,0,0}
Triangle tab:X{1,0};Y{-0.37,1.16};O{0,0}にセットする。左右反転、125で2回縮小、
35度で時計回り、0.2で左へ移動、0.52で下へ移動
Colors tab:Transform color=0;Color speed=0;
New transform T2:Weight=0.2;
Variations tab:linear=0;noise=0.07;julia3Dz=2;pre_bwraps=0.9
Variables tab:julia3Dz{3};pre_bwraps{1,0,1,0,0}
Triangle tab:X{1,0};Y{-0.51,0.47};O{0,0}にセットする。上下反転、110で2回縮小、
44度で時計回り、0.2で右へ移動、0.03で上へ移動
Colors tab:Transform color=0.5;Color speed=0
Adjustment window で。Scale=25;
Rendering tab:Gamma=4;Brightness=4;
Gradient tabで色番号382を選択。;
Display Density の値を大きくすると綺麗になります。
(ただ、再描画に時間はかかります。)
以上で下図のような画像となります。
TO Menu
(81)pre_discなどを使って
参照したものはありません。
Editor window で。
New flame T1:Weight=0.5;
Variations tab:linear=0;julian=0.728;pre_disc=0.27;
Variables tab:julian{6,1}
Triangle tab:110で3回縮小、155度で反時計回り、
0.04で右へ移動、0.36で下へ移動
Colors tab:Transform color=0;Color speed=0;
New transform T2:Weight=0.5;
Variations tab:linear=0;lazysusan=0.91;modulus=0.08;
Variables tab:lazysusan{3.14159,0,0,0,0};modulus{1,1}
Triangle tab:110で2回縮小、
135度で反時計回り、0.04で右へ移動、0.01で下へ移動
Colors tab:Transform color=1;Color speed=0
Adjustment window で。Scale=60;
Rendering tab:Gamma=4;Brightness=4;
Gradient tabで色番号196を選択。;
Display Density の値を大きくすると綺麗になります。
(ただ、再描画に時間はかかります。)
以上で下図のような画像となります。
TO Menu
(82)diamondなどを使って
参照したものはありません。
Editor window で。
New flame T1:Weight=0.4;
Variations tab:linear=0;diamond=0.5;pre_rotate_x=0.5;
Triangle tab:110で3回縮小、144度で時計回り、
0.12で右へ移動、0.26で上へ移動
Colors tab:Transform color=0;Color speed=0;
New transform T2:Weight=0.5;
Variations tab:linear=0;butterfly=0.95;whorl=0.047;
Variables tab:whorl{1,1};
Triangle tab:110で1回縮小、
173度で反時計回り、0.3で右へ移動、0.64で上へ移動
Colors tab:Transform color=1;Color speed=0
New transform T3:Weight=1;
Variations tab:linear=1;
Triangle tab:左右反転
Colors tab:Transform color=1;Color speed=1
Adjustment window で。Scale=75;
Camera tab:x-Position:0;y-Position:-0.3
Rendering tab:Gamma=4;Brightness=4;
Gradient tabで色番号207を選択。;
Display Density の値を大きくすると綺麗になります。
(ただ、再描画に時間はかかります。)
以上で下図のような画像となります。
TO Menu
(83)horseshoeなどを使って
参照したものはありません。
Editor window で。
New flame T1:Weight=0.5;
Variations tab:linear=0;horseshoe=0.36;bubble=0.64;
Triangle tab:110で4回縮小、55度で反時計回り、
0.35で左へ移動、0.75で下へ移動
Colors tab:Transform color=0;Color speed=0;
New transform T2:Weight=0.5;
Variations tab:linear=0;loonie=0.87;octapol=0.13;
Variables tab:octapol{0,1,0.5,0.5};
Triangle tab:110で5回縮小、
160度で反時計回り、0.55で右へ移動、0.77で上へ移動
Colors tab:Transform color=1;Color speed=0
New transform T3:Weight=1;
Variations tab:linear=1;
Triangle tab:左右反転
Colors tab:Transform color=1;Color speed=1
Adjustment window で。Scale=45;
Camera tab:x-Position:0;y-Position:-0.3
Rendering tab:Gamma=4;Brightness=4;
Gradient tabで色番号475を選択。;
Display Density の値を大きくすると綺麗になります。
(ただ、再描画に時間はかかります。)
以上で下図のような画像となります。
TO Menu
(84)splitsなどを使って
参照したものはありません。
Editor window で。
New flame T1:Weight=90;
Variations tab:linear=0;splits=1;
Variables tab:splits{0,0.1};
Triangle tab:110で1回縮小、20度で時計回り、
0.18で右へ移動、0.01で下へ移動
Colors tab:Transform color=0.38;Color speed=0;
New transform T2:Weight=100;
Variations tab:linear=0;splits=1;
Variables tab:splits{0,0.1};
Triangle tab:110で1回拡大、
155度で時計回り、0.01で右へ移動、0.02で下へ移動
Colors tab:Transform color=0.09;Color speed=0
New transform T3:Weight=5;
Variations tab:linear=0;cylinder=0.03;gaussian_blur=0.005;pre_blur=0.5;
Triangle tab:110で6回縮小、0.04で右へ移動、0.04で下へ移動
Colors tab:Transform color=0.03;Color speed=0
Enable final transform Fx:
Variations tab:linear=0;julian=1
Variables tab:julian{4,1};
Colors tab:Transform color=0;Color speed=1;
Adjustment window で。Scale=25;
Rendering tab:Gamma=4;Brightness=4;
Gradient tabで色番号289を選択。;
Display Density の値を大きくすると綺麗になります。
(ただ、再描画に時間はかかります。)
以上で下図のような画像となります。
TO Menu
(85)eyefishなどを使って
参照したものはありません。
Editor window で。
New flame T1:Weight=0.5;
Variations tab:linear=0;eyefish=0.87;bubble=0.126;
Triangle tab:110で5回縮小、114度で時計回り、
0.32で左へ移動、0.14で上へ移動
Colors tab:Transform color=0;Color speed=0;
New transform T2:Weight=0.5;
Variations tab:linear=0;horseshoe=0.54;disc=0.45;
Triangle tab:110で1回縮小、
96度で時計回り、0.69で右へ移動、0.16で上へ移動
Colors tab:Transform color=1;Color speed=0
Adjustment window で。Scale=50;
Camera tab:x-Position:-0.1;y-Position:-0.25
Rendering tab:Gamma=4;Brightness=4;
Gradient tabで色番号490を選択。;
Display Density の値を大きくすると綺麗になります。
(ただ、再描画に時間はかかります。)
以上で下図のような画像となります。
TO Menu
(86)splitsなどを使って
参照したものはありません。
Editor window で。
New flame T1:Weight=50;
Variations tab:linear=0;splits=1;
Variables tab:splits{0,0.1};
Triangle tab:20度で時計回り、0.01で左へ移動、0.01で下へ移動
Colors tab:Transform color=0.38;Color speed=0;
New transform T2:Weight=100;
Variations tab:linear=0;splits=1;
Variables tab:splits{0,0.1};
Triangle tab:105で1回拡大、
155度で時計回り、0.01で右へ移動、0.02で下へ移動
Colors tab:Transform color=0.09;Color speed=0
New transform T3:Weight=5;
Variations tab:linear=0;cylinder=0.03;gaussian_blur=0.005;pre_blur=0.5;
Triangle tab:110で6回縮小、0.04で右へ移動、0.04で下へ移動
Colors tab:Transform color=0.03;Color speed=0
Enable final transform Fx:
Variations tab:linear=0;julia3Dz=1
Variables tab:julia3Dz{-5};
Colors tab:Transform color=0;Color speed=1;
Adjustment window で。Scale=25;
Rendering tab:Gamma=4;Brightness=4;
Gradient tabで色番号250を選択。;
Display Density の値を大きくすると綺麗になります。
(ただ、再描画に時間はかかります。)
以上で下図のような画像となります。
TO Menu
(87)zconeなどを使って
参照したものはありません。
Editor window で。
New flame T1:Weight=0.4;
Variations tab:linear=0;zcone=0.23;julia3Dz=0.77;
Variables tab:julia3Dz{5};
Triangle tab:110で4回縮小、43度で反時計回り、
0.09で右へ移動、0.07で下へ移動
Colors tab:Transform color=0;Color speed=0;
New transform T2:Weight=0.5;
Variations tab:linear=0;blur_zoom=0.14;elliptic=0.86;
Variables tab:blur_zoom{0,0,0};
Triangle tab:110で2回縮小、上下反転、
88度で反時計回り、0.02で左へ移動、0.05で上へ移動
Colors tab:Transform color=1;Color speed=0
Adjustment window で。Scale=50;
Rendering tab:Gamma=4;Brightness=4;
Gradient tabで色番号631を選択。;
Display Density の値を大きくすると綺麗になります。
(ただ、再描画に時間はかかります。)
以上で下図のような画像となります。
TO Menu
(88)splitsなどを使って
参照したものはありません。
Editor window で。
New flame T1:Weight=50;
Variations tab:linear=0;splits=1;
Variables tab:splits{0,0.1};
Triangle tab:110で4回拡大、15度で反時計回り、0.01で左へ移動、0.01で下へ移動
Colors tab:Transform color=0.38;Color speed=0;
New transform T2:Weight=100;
Variations tab:linear=0;splits=1;
Variables tab:splits{0,0.1};
Triangle tab:110で2回拡大、
5度で時計回り、0.01で右へ移動、0.02で下へ移動
Colors tab:Transform color=0.09;Color speed=0
New transform T3:Weight=5;
Variations tab:linear=0;cylinder=0.03;gaussian_blur=0.005;pre_blur=0.5;
Triangle tab:110で8回縮小、0.05で右へ移動、0.04で上へ移動
Colors tab:Transform color=0.03;Color speed=0
Enable final transform Fx:
Variations tab:linear=0;julia3Dz=1
Variables tab:julia3Dz{-5};
Colors tab:Transform color=0;Color speed=1;
Adjustment window で。Scale=25;
Rendering tab:Gamma=4;Brightness=4;
Gradient tabで色番号106を選択。;
Display Density の値を大きくすると綺麗になります。
(ただ、再描画に時間はかかります。)
以上で下図のような画像となります。
TO Menu
(89)zblurなどを使って
参照したものはありません。
Editor window で。
New flame T1:Weight=0.6;
Variations tab:linear=0;zblur=0.056;rings2=0.94;
Variables tab:rings2{0,634};
Triangle tab:110で1回縮小、125で1回縮小、11度で反時計回り、
0.2で右へ移動、0.54で下へ移動
Colors tab:Transform color=0;Color speed=0;
New transform T2:Weight=0.3;
Variations tab:linear=0;curl3D=0.2;handkerchief=0.78;
Variables tab:curl3D{0,0,0};
Triangle tab:110で10回縮小、
16度で時計回り、0.71で左へ移動、0.1で上へ移動
Colors tab:Transform color=1;Color speed=0
New transform T3:Weight=1;
Variations tab:linear=1;
Triangle tab:左右反転
Colors tab:Transform color=1;Color speed=1
Adjustment window で。Scale=30;
Rendering tab:Gamma=4;Brightness=4;
Gradient tabで色番号239を選択。;
Display Density の値を大きくすると綺麗になります。
(ただ、再描画に時間はかかります。)
以上で下図のような画像となります。
TO Menu
(90)zblurなどを使って
参照したものはありません。(88)とほぼ同じ。
Editor window で。
New flame T1:Weight=0.5;
Variations tab:linear=0;zblur=0.056;rings2=0.94;
Variables tab:rings2{0,634};
Triangle tab:110で1回縮小、125で1回縮小、11度で反時計回り、
Colors tab:Transform color=0;Color speed=0;
New transform T2:Weight=0.3;
Variations tab:linear=0;curl3D=0.2;handkerchief=0.78;
Variables tab:curl3D{0,0,0};
Triangle tab:110で10回縮小、
16度で時計回り、0.71で左へ移動、0.1で上へ移動
Colors tab:Transform color=1;Color speed=0
New transform T3:Weight=1;
Variations tab:linear=1;
Triangle tab:左右反転
Colors tab:Transform color=1;Color speed=1
Adjustment window で。Scale=40;
Camera tab:x-Position:0;y-Position:-0.15
Rendering tab:Gamma=4;Brightness=4;
Gradient tabで色番号119を選択。;
Display Density の値を大きくすると綺麗になります。
(ただ、再描画に時間はかかります。)
以上で下図のような画像となります。
TO Menu
(91)sphericalなどを使って
参照したものはありません。
Editor window で。
New flame T1:Weight=0.5;
Variations tab:linear=0;spherical=0.24;blur_zoom=0.75;
Variables tab:blur_zoom{0,0,0};
Triangle tab:125で1回縮小、98度で時計回り、
0.28で左へ移動、0.49で上へ移動
Colors tab:Transform color=0;Color speed=0;
New transform T2:Weight=0.5;
Variations tab:linear=0;cylinder=0.5;pdj=0.18;
Variables tab:pdj{2,-2,2,0.1};
Triangle tab:110で10回縮小、
30度で反時計回り、0.27で右へ移動
Colors tab:Transform color=1;Color speed=0
New transform T3:Weight=1;
Variations tab:linear=1;
Triangle tab:左右反転
Colors tab:Transform color=1;Color speed=1
Adjustment window で。Scale=25;
Rendering tab:Gamma=4;Brightness=4;
Gradient tabで色番号368を選択。;
Display Density の値を大きくすると綺麗になります。
(ただ、再描画に時間はかかります。)
以上で下図のような画像となります。
TO Menu
(92)ztranslateなどを使って
参照したものはありません。(88)とほぼ同じ。
Editor window で。
New flame T1:Weight=0.5;
Variations tab:linear=0;ztranslate=0.15;juliaq=0.85;
Variables tab:juliaq{3,2};
Triangle tab:125で2回縮小、77度で反時計回り、
0.96で右へ移動、0.25で下へ移動
Colors tab:Transform color=0;Color speed=0;
New transform T2:Weight=0.5;
Variations tab:linear=0;waves2=0.22;pre_spherical=0.77;
Variables tab:waves2{2,2,0,1,1,0};
Triangle tab:125で4回縮小、
32度で反時計回り、0.16で左へ移動、0.94で下へ移動
Colors tab:Transform color=1;Color speed=0
New transform T3:Weight=1;
Variations tab:linear=1;
Triangle tab:左右反転
Colors tab:Transform color=1;Color speed=1
New transform T4:Weight=1;
Variations tab:linear=1;
Triangle tab:120度で時計回り、
Colors tab:Transform color=0;Color speed=1
New transform T5:Weight=1;
Variations tab:linear=1;
Triangle tab:120度で反時計回り、
Colors tab:Transform color=1;Color speed=1
Adjustment window で。Scale=30;
Rendering tab:Gamma=4;Brightness=4;
Gradient tabで色番号276を選択。;
Display Density の値を大きくすると綺麗になります。
(ただ、再描画に時間はかかります。)
以上で下図のような画像となります。
TO Menu
(93)curl3Dなどを使って
参照したものはありません。
Editor window で。
New flame T1:Weight=0.4;
Variations tab:linear=0;curl3D=0.31;crop=0.68;
Variables tab:curl3D{0,0,0};crop{-1,-1,1,1,0,0};
Triangle tab:105で1回縮小、41度で時計回り、0.11で左へ移動、0.37で下へ移動
Colors tab:Transform color=0.38;Color speed=0;
New transform T2:Weight=0.2;
Variations tab:linear=0;pdj=0.51;pre_bwraps=0.48
Variables tab:pdj{2,-1,-2,0.1};pre_bwraps{1,0,1,0,0};
Triangle tab:125で3回縮小、
127度で時計回り、0.24で左へ移動、0.46で下へ移動
Colors tab:Transform color=0.5;Color speed=0
New transform T3:Weight=0.3;
Variations tab:linear=0;hemisphere=0.7;radial_blur=0.3;
Variables tab:radial_blur{0.3};
Triangle tab:125で2回縮小、109度で時計回り、1.03で右へ移動、0.74で上へ移動
Colors tab:Transform color=1;Color speed=0
Adjustment window で。Scale=30;
Camera tab:x-Position:-0.2;y-Position:0.3
Rendering tab:Gamma=4;Brightness=4;
Gradient tabで色番号212を選択。;
Display Density の値を大きくすると綺麗になります。
(ただ、再描画に時間はかかります。)
以上で下図のような画像となります。
TO Menu
(94)crossなどを使って
参照したものはありません。
Editor window で。
New flame T1:Weight=0.8;
Variations tab:linear=0;zblur=0.64;cross=0.36;
Triangle tab:110で1回縮小、163度で時計回り、
1.2で左へ移動、1.0で下へ移動
Colors tab:Transform color=0;Color speed=0;
New transform T2:Weight=0.2;
Variations tab:linear=0;pre_rotate_y=0.87;bwraps=0.12;
Variables tab:bwraps{1,0,1,0,0};
Triangle tab:110で16回縮小、左右反転、
152度で時計回り、0.96で左へ移動、0.95で下へ移動
Colors tab:Transform color=1;Color speed=0
Adjustment window で。Scale=40;
Camera tab:x-Position:-0.35;y-Position:0.2
Rendering tab:Gamma=4;Brightness=4;
Gradient tabで色番号237を選択。;
Display Density の値を大きくすると綺麗になります。
(ただ、再描画に時間はかかります。)
以上で下図のような画像となります。
TO Menu
(95)hyperblicなどを使って
参照したものはありません。
Editor window で。
New flame T1:Weight=0.5;
Variations tab:linear=0;hyperblic=0.89;post_curl=0.11;
Variables tab:post_curl{0,0};
Triangle tab:110で1回縮小、左右反転、75度で時計回り、
0.28で右へ移動、0.12で下へ移動
Colors tab:Transform color=0;Color speed=0;
New transform T2:Weight=0.5;
Variations tab:linear=0;pre_rotate_x=0.31;juliascope=0.68;
Variables tab:juliascope{5,1};
Triangle tab:110で8回縮小、45度で時計回り、
0.29で左へ移動、0.11で上へ移動
Colors tab:Transform color=1;Color speed=0
Adjustment window で。Scale=35;
Camera tab:x-Position:-0.35;y-Position:0.2
Rendering tab:Gamma=4;Brightness=4;
Gradient tabで色番号531を選択。;
Display Density の値を大きくすると綺麗になります。
(ただ、再描画に時間はかかります。)
以上で下図のような画像となります。
TO Menu
(96)horseshoeなどを使って
参照したものはありません。
Editor window で。
New flame T1:Weight=0.4;
Variations tab:linear=0;horseshoe=0.32;pre_rotate_y=0.68;
Triangle tab:125で1回縮小、97度で反時計回り、0.37で右へ移動、0.89で上へ移動
Colors tab:Transform color=0.38;Color speed=0;
New transform T2:Weight=0.3;
Variations tab:linear=0;eyefish=1;
Triangle tab:125で3回縮小、110で1回縮小、
16度で反時計回り、0.33で右へ移動、0.34で上へ移動
Colors tab:Transform color=0.5;Color speed=0
New transform T3:Weight=0.2;
Variations tab:linear=0;pre_rotate_x=0.001;radial_blur=1;
Variables tab:radial_blur{-0.8};
Triangle tab:125で2回縮小、上下反転、21度で反時計回り、
0.06で右へ移動、0.4で上へ移動
Colors tab:Transform color=1;Color speed=0
Adjustment window で。Scale=40;
Camera tab:x-Position:0.2;y-Position:0.1
Rendering tab:Gamma=4;Brightness=4;
Gradient tabで色番号555を選択。;
Display Density の値を大きくすると綺麗になります。
(ただ、再描画に時間はかかります。)
以上で下図のような画像となります。
TO Menu
(97)bubbleなどを使って
参照したものはありません。
Editor window で。
New flame T1:Weight=0.6;
Variations tab:linear=0;radial_blur=1;
Variables tab:bwraps{-0.9};
Triangle tab:110で6回縮小、105度で反時計回り、
0.44で左へ移動、0.9で上へ移動
Colors tab:Transform color=0;Color speed=0;
New transform T2:Weight=0.5;
Variations tab:linear=0;bubble=0.72;post_rotate_x=0.27;
Triangle tab:136度で反時計回り、0.09で左へ移動、0.5で下へ移動
Colors tab:Transform color=1;Color speed=0
Adjustment window で。Scale=60;
Camera tab:x-Position:0;y-Position:0.4
Rendering tab:Gamma=4;Brightness=4;
Gradient tabで色番号173を選択。;
Display Density の値を大きくすると綺麗になります。
(ただ、再描画に時間はかかります。)
以上で下図のような画像となります。
TO Menu
(98)julia3Dなどを使って
参照したものはありません。
Editor window で。
New flame T1:Weight=0.4;
Variations tab:linear=0;post_rotate_y=0.6;radial_blur=0.4;
Variables tab:radial_blur{0.6};
Triangle tab:(110で1回:125で1回)拡大、4度で反時計回り、
0.47で右へ移動、0.24で上へ移動
Colors tab:Transform color=0;Color speed=0;
New transform T2:Weight=0.5;
Variations tab:linear=0;pre_rotate_x=0.11;julia3D=0.88;
Variables tab:julia3D{-5};
Triangle tab:125で1回縮小、0.6で右へ移動
Colors tab:Transform color=1;Color speed=0
Adjustment window で。Scale=28;
Rendering tab:Gamma=4;Brightness=4;
Gradient tabで色番号351を選択。;
Display Density の値を大きくすると綺麗になります。
(ただ、再描画に時間はかかります。)
以上で下図のような画像となります。
TO Menu
(99)flattenなどを使って
参照したものはありません。
Editor window で。
New flame T1:Weight=0.5;
Variations tab:linear=0;flatten=0.15;loonie=0.85;
Triangle tab:(110で1回、125で1回)縮小、24度で反時計回り、
0.02で左へ移動、0.01で上へ移動
Colors tab:Transform color=0;Color speed=0;
New transform T2:Weight=0.5;
Variations tab:linear=0;julia3Dz=0.95;curl3D=0.05;
Variables tab:julia3Dz{-6};curl3D{0,0,0};
Triangle tab:110で6回縮小、
175度で反時計回り、0.32で右へ移動、0.15で下へ移動
Colors tab:Transform color=1;Color speed=0
Adjustment window で。Scale=25;
Rendering tab:Gamma=4;Brightness=4;
Gradient tabで色番号531を選択。;
Display Density の値を大きくすると綺麗になります。
(ただ、再描画に時間はかかります。)
以上で下図のような画像となります。
TO Menu
(100)discなどを使って
参照したものはありません。
Editor window で。
New flame T1:Weight=0.3;
Variations tab:linear=0;disc=0.4;post_bwraps=0.6;
Variables tab:post_bwraps{1,0,1,0,0};
Triangle tab:110で1回縮小、6度で時計回り、
0.02で右へ移動、0.3で下へ移動
Colors tab:Transform color=0;Color speed=0;
New transform T2:Weight=0.3;
Variations tab:linear=0;julian=0.6;flatten=0.4;
Variables tab:julian{6,1};
Triangle tab:(110で1回、125で1回)縮小、
25度で反時計回り、0.01で左へ移動
Colors tab:Transform color=0.5;Color speed=0
Adjustment window で。Scale=55;
Rendering tab:Gamma=4;Brightness=4;
Gradient tabで色番号333を選択。;
Display Density の値を大きくすると綺麗になります。
(ただ、再描画に時間はかかります。)
以上で下図のような画像となります。
TO Menu
(101)waves2などを使って
参照したものはありません。
Editor window で。
New flame T1:Weight=0.5;
Variations tab:linear=0;waves2=0.74;post_curl=0.26;
Variables tab:waves2{2,2,0,1,1,0};post_curl{0,0};
Triangle tab:110で4回縮小、60度で反時計回り、0.93で右へ移動、0.3で下へ移動
Colors tab:Transform color=0;Color speed=0;
New transform T2:Weight=0.5;
Variations tab:linear=0;radial_blur=0.58;foci=0.42
Variables tab:radial_blur{-0.57};
Triangle tab:125で1回縮小、0.26で右へ移動、0.91で下へ移動
Colors tab:Transform color=0.5;Color speed=0
New transform T3:Weight=0.5;
Variations tab:linear=0;julia3D=0.66;waves2=0.33;
Variables tab:julia3D{1};waves2{2,2,0,1,1,0};
Triangle tab:(125で1回、110で3回)縮小、10度で時計回り、
0.48で左へ移動、0.48で上へ移動
Colors tab:Transform color=1;Color speed=0
Adjustment window で。Scale=20;
Camera tab:x-Position:0.1;y-Position:0.3
Rendering tab:Gamma=4;Brightness=7;
Gradient tabで色番号220を選択。;
Display Density の値を大きくすると綺麗になります。
(ただ、再描画に時間はかかります。)
以上で下図のような画像となります。
TO Menu
(102)post_rotate_yなどを使って
参照したものはありません。
Editor window で。
New flame T1:Weight=0.4;
Variations tab:linear=0;post_rotate_y=0.6;radial_blur=0.4;
Variables tab:radial_blur{0.65};
Triangle tab:125で1回縮小、8度で反時計回り、
0.4で右へ移動、0.7で上へ移動
Colors tab:Transform color=0;Color speed=0;
New transform T2:Weight=0.5;
Variations tab:linear=0;pre_rotate_x=0.1;julia3D=0.9;
Variables tab:julia3D{-5};
Triangle tab:125で18回拡大、0.13で右へ移動、0.09で上へ移動
Colors tab:Transform color=1;Color speed=0
Adjustment window で。Scale=35;
Rendering tab:Gamma=4;Brightness=4;
Gradient tabで色番号072を選択。;
Display Density の値を大きくすると綺麗になります。
(ただ、再描画に時間はかかります。)
以上で下図のような画像となります。
TO Menu
(103)juliascopeなどを使って
参照したものはありません。
Editor window で。
New flame T1:Weight=0.5;
Variations tab:linear=0;juliascope=0.2;pre_spherical=0.9;
Variables tab:juliascope{2,1.5};
Triangle tab:X{1,0};Y{1,1};O{0,0}と設定、80度で時計回り、
0.4で左へ移動、0.06で下へ移動
Colors tab:Transform color=0.02;Color speed=0;
New transform T2:Weight=0.3;
Variations tab:linear=0;hyperbolic=1;noise=0.06;
Triangle tab:110で2回縮小、146度で反時計回り、0.72で左へ移動、0.05で下へ移動
Colors tab:Transform color=1;Color speed=0
Adjustment window で。Scale=30;
Rendering tab:Gamma=4;Brightness=4;
Gradient tabで色番号502を選択。;
Display Density の値を大きくすると綺麗になります。
(ただ、再描画に時間はかかります。)
以上で下図のような画像となります。
TO Menu
(104)radial_blurなどを使って
参照したものはありません。
Editor window で。
New flame T1:Weight=0.5;
Variations tab:linear=0;radial_blur=0.27;splits=0.73;
Variables tab:radial_blur{-0.7};splits{0,0};
Triangle tab:110で3回縮小、0.07で右へ移動、
Colors tab:Transform color=0;Color speed=0;
New transform T2:Weight=0.4;
Variations tab:linear=0;epispiral=0.05;julia3D=1;
Variables tab:epispiral{6,0,1};julia3D{-4};
Triangle tab:(110で4回、125で1回)縮小、33度で反時計回り、0.38で左へ移動、0.27で下へ移動
Colors tab:Transform color=1;Color speed=0
Adjustment window で。Scale=20;
Rendering tab:Gamma=4;Brightness=4;
Gradient tabで色番号318を選択。;
Display Density の値を大きくすると綺麗になります。
(ただ、再描画に時間はかかります。)
以上で下図のような画像となります。
TO Menu
(105)radial_blurなどを使って
参照したものはありません。
Editor window で。
New flame T1:Weight=2;
Variations tab:linear=0;radial_blur=0.2;julia3D=0.7;
Variables tab:radial_blur{0};julia3D{-5};
Triangle tab:110で4回縮小、153度で時計回り、0.02で上へ移動、
Colors tab:Transform color=0.558;Color speed=0;
New transform T2:Weight=0.4;
Variations tab:linear=0;pre_blur=0.4;juliascope=0.3;
Variables tab:juliascope{6,2};
Triangle tab:125で2回縮小、132度で反時計回り、0.52で右へ移動、0.33で下へ移動
Colors tab:Transform color=0.773;Color speed=0
Adjustment window で。Scale=28;
Rendering tab:Gamma=4;Brightness=4;
Gradient tabで色番号237を選択。;
Display Density の値を大きくすると綺麗になります。
(ただ、再描画に時間はかかります。)
以上で下図のような画像となります。
TO Menu
(106)radial_blurなどを使って
参照したものはありません。(105)とほぼ同じ。
Editor window で。
New flame T1:Weight=0.6;
Variations tab:linear=0;radial_blur=0.2;julia3D=0.7;
Variables tab:radial_blur{0};julia3D{-5};
Triangle tab:110で3回縮小、153度で時計回り、0.17で左へ移動、0.25で上へ移動、
Colors tab:Transform color=0.73;Color speed=0;
New transform T2:Weight=0.4;
Variations tab:linear=0;pre_blur=1;juliascope=0.3;
Variables tab:juliascope{2,1};
Triangle tab:110で2回縮小、142度で反時計回り、0.81で右へ移動、0.06で下へ移動
Colors tab:Transform color=0.32;Color speed=0
Adjustment window で。Scale=30;
Rendering tab:Gamma=4;Brightness=4;
Gradient tabで色番号138を選択。;
Display Density の値を大きくすると綺麗になります。
(ただ、再描画に時間はかかります。)
以上で下図のような画像となります。
TO Menu
(107)zblurなどを使って
参照したものはありません。
Editor window で。
New flame T1:Weight=0.4;
Variations tab:linear=0;zblur=0.8;julian=0.2;
Variables tab:julian{4,1};
Triangle tab:125で2回縮小、9度で時計回り、0.28で右へ移動、0.24で下へ移動、
Colors tab:Transform color=0;Color speed=0;
New transform T2:Weight=0.6;
Variations tab:linear=0;pdj=0.216;scry=0.78;
Variables tab:pdj{-1.9,2.33,-0.73,-1.5};
Triangle tab:110で1回縮小、154度で反時計回り、0.98で右へ移動、0.46で下へ移動
Colors tab:Transform color=1;Color speed=0
New transform T3:Weight=1;
Variations tab:linear=1;
Triangle tab:120度で時計回り;
Colors tab:Transform color=0;Color speed=1
New transform T4:Weight=1;
Variations tab:linear=1;
Triangle tab:120度で反時計回り;
Colors tab:Transform color=1;Color speed=1
Adjustment window で。Scale=60;
Camera tab:X-Position:0;Y-Position:0.05
Rendering tab:Gamma=4;Brightness=4;
Gradient tabで色番号321を選択。;
Display Density の値を大きくすると綺麗になります。
(ただ、再描画に時間はかかります。)
以上で下図のような画像となります。
TO Menu
(108)separationなどを使って
参照したものはありません。
Editor window で。
New flame T1:Weight=0.4;
Variations tab:linear=0;separation=0.9;julian=0.08;
Variables tab:separation{1,1,0,0};julian{3,1};
Triangle tab:110で2回縮小、115度で時計回り、0.06で左へ移動、0.28で下へ移動、
Colors tab:Transform color=0;Color speed=0;
New transform T2:Weight=0.5;
Variations tab:linear=0;post_rotate_y=0.02;loonie=0.98;
Triangle tab:110で1回縮小、155度で反時計回り、0.35で左へ移動、0.52で下へ移動
Colors tab:Transform color=1;Color speed=0
Adjustment window で。Scale=18;
Camera tab:X-Position:0;Y-Position:0.1
Rendering tab:Gamma=4;Brightness=4;
Gradient tabで色番号511を選択。;
Display Density の値を大きくすると綺麗になります。
(ただ、再描画に時間はかかります。)
以上で下図のような画像となります。
TO Menu
(109)blur_zoomなどを使って
参照したものはありません。
Editor window で。
New flame T1:Weight=0.5;
Variations tab:linear=0;blur_zoom=0.68;crop=0.31;
Variables tab:blur_zoom{0,0,0};crop{-1,-1,1,1,0,0};
Triangle tab:110で4回縮小、175度で反時計回り、0.21で左へ移動、0.33で下へ移動、
Colors tab:Transform color=0;Color speed=0;
New transform T2:Weight=0.5;
Variations tab:linear=0;auger=0.9;modulus=0.1;
Variables tab:auger{5,0.5,0.1,0};modulus{1,1};
Triangle tab:125で4回縮小、133度で時計回り、0.04で左へ移動、0.01で上へ移動
Colors tab:Transform color=1;Color speed=0
New transform T3:Weight=1;
Variations tab:linear=1;
Triangle tab:左右反転;
Colors tab:Transform color=1;Color speed=1
Adjustment window で。Scale=70;
Camera tab:X-Position:0;Y-Position:0.1
Rendering tab:Gamma=4;Brightness=4;
Gradient tabで色番号260を選択。;
Display Density の値を大きくすると綺麗になります。
(ただ、再描画に時間はかかります。)
以上で下図のような画像となります。
TO Menu
(110)murl2などを使って
参照したものはありません。
Editor window で。
New flame T1:Weight=0.3;
Variations tab:linear=0;post_curl3D=0.013;murl2=1;
Variables tab:post_curl3D{0,0,0};murl2{0,1};
Triangle tab:110で3回縮小、30度で反時計回り、0.1で左へ移動、0.31で上へ移動、
Colors tab:Transform color=0;Color speed=0;
New transform T2:Weight=0.3;
Variations tab:linear=0;spherical=0.4;post_bwraps=0.6;
Variables tab:post_bwraps{1,0,1,0,0};
Triangle tab:110で1回縮小、上下反転、75度で時計回り、0.48で左へ移動、0.83で上へ移動
Colors tab:Transform color=1;Color speed=0
New transform T3:Weight=1;
Variations tab:linear=1;
Triangle tab:左右反転;
Colors tab:Transform color=1;Color speed=1
Adjustment window で。Scale=50;
Camera tab:X-Position:0;Y-Position:-0.55
Rendering tab:Gamma=4;Brightness=4;
Gradient tabで色番号284を選択。;
Display Density の値を大きくすると綺麗になります。
(ただ、再描画に時間はかかります。)
以上で下図のような画像となります。
TO Menu

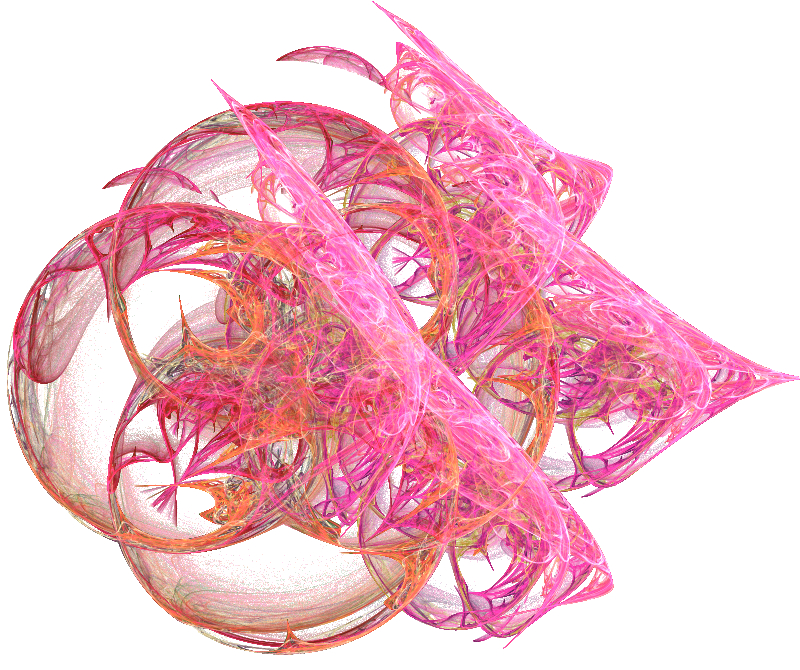 :
:
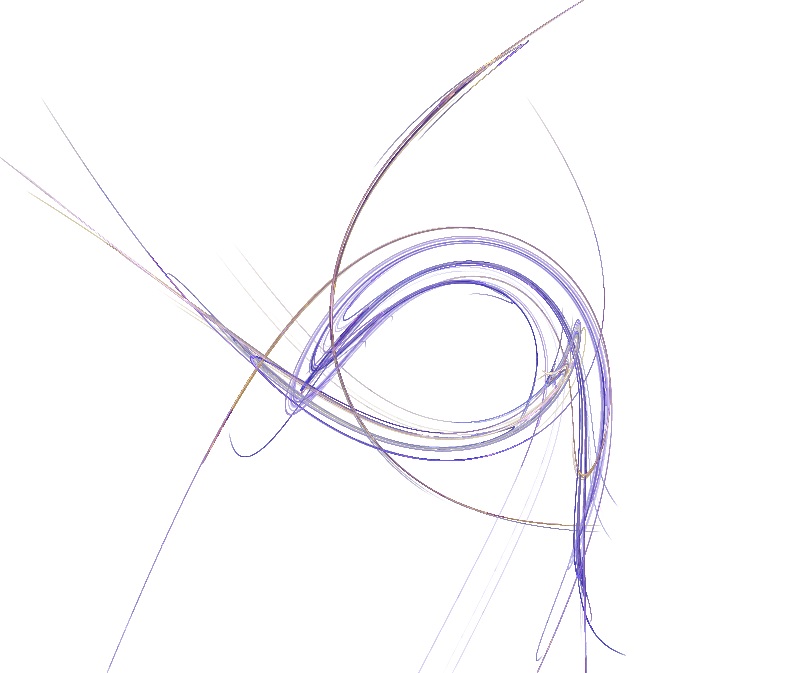 :
:
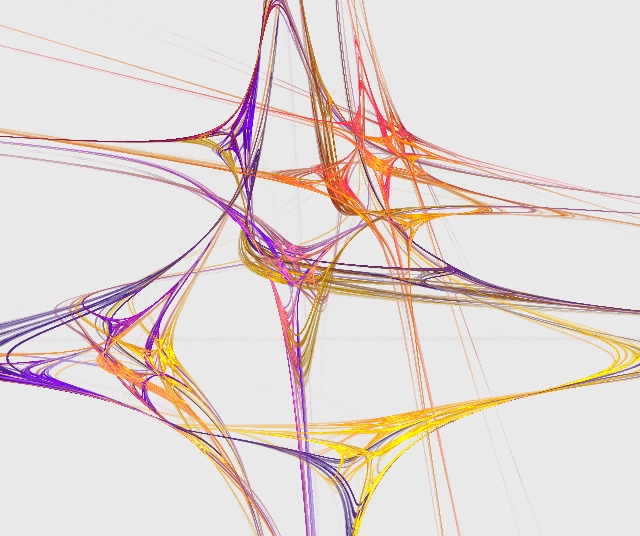 :
:
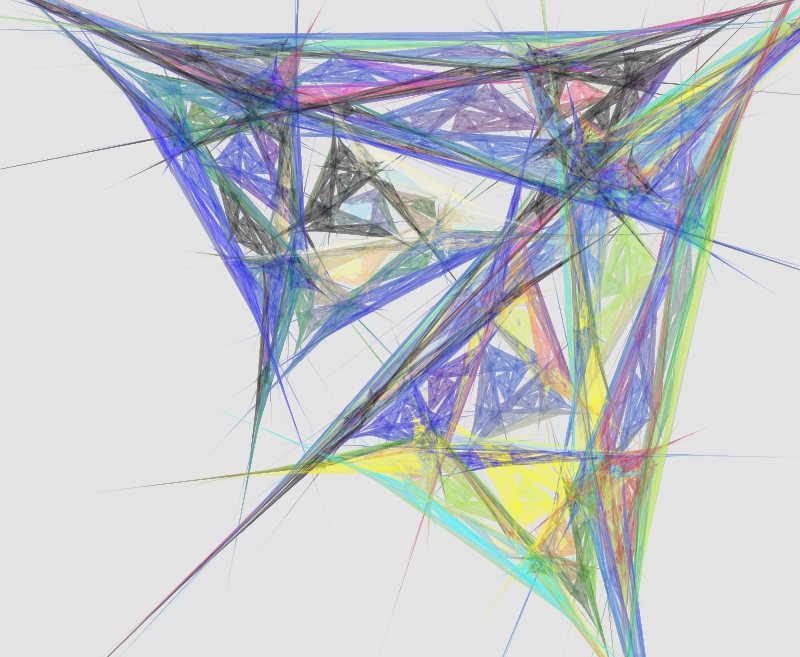 :
:
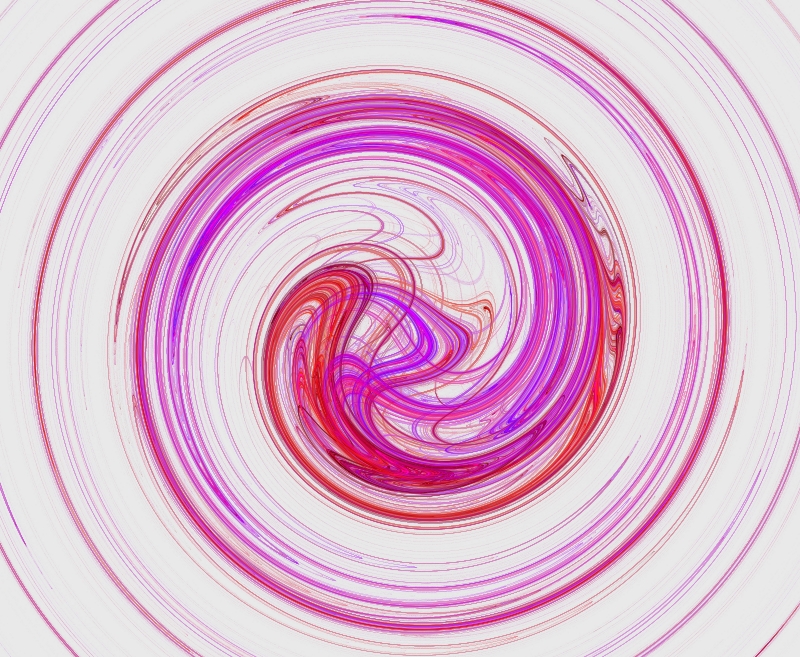 :
:
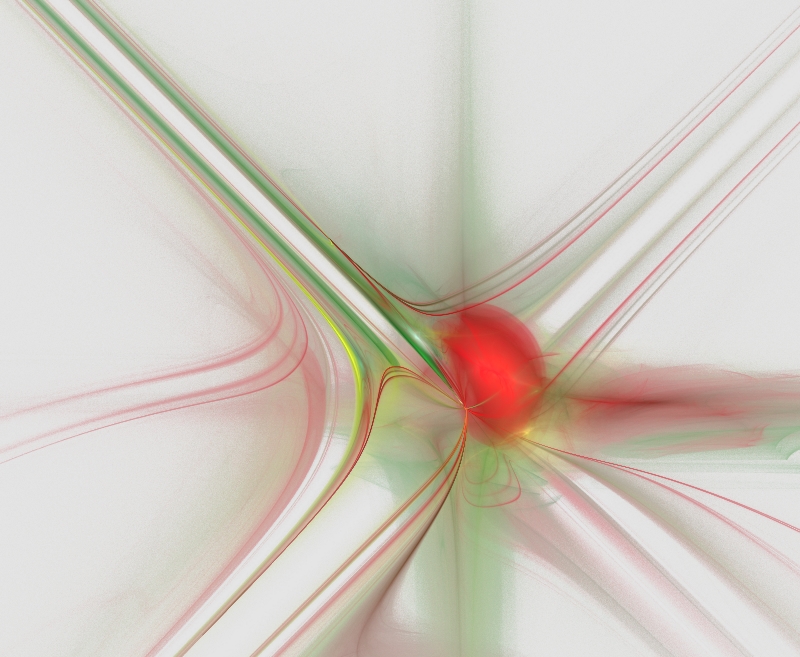 :
:
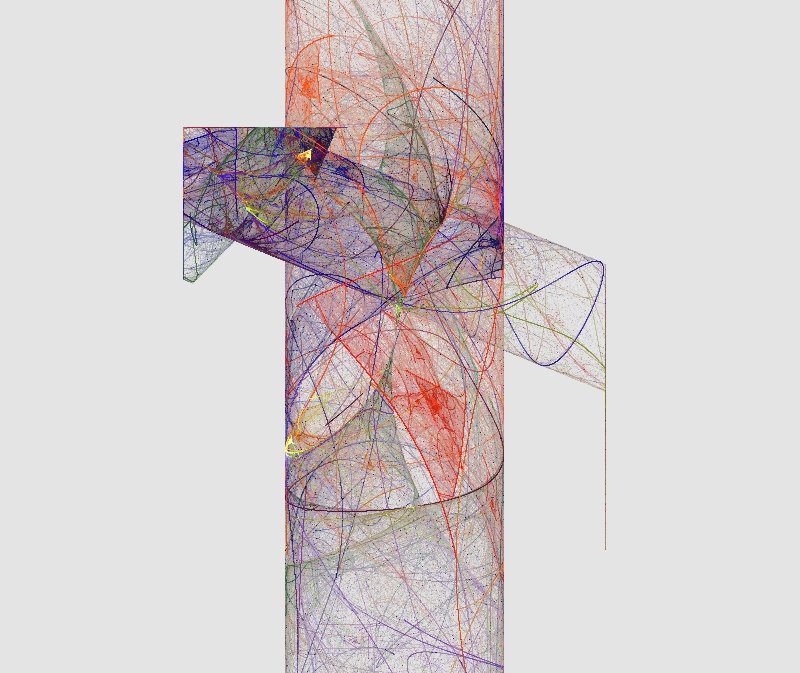 :
:
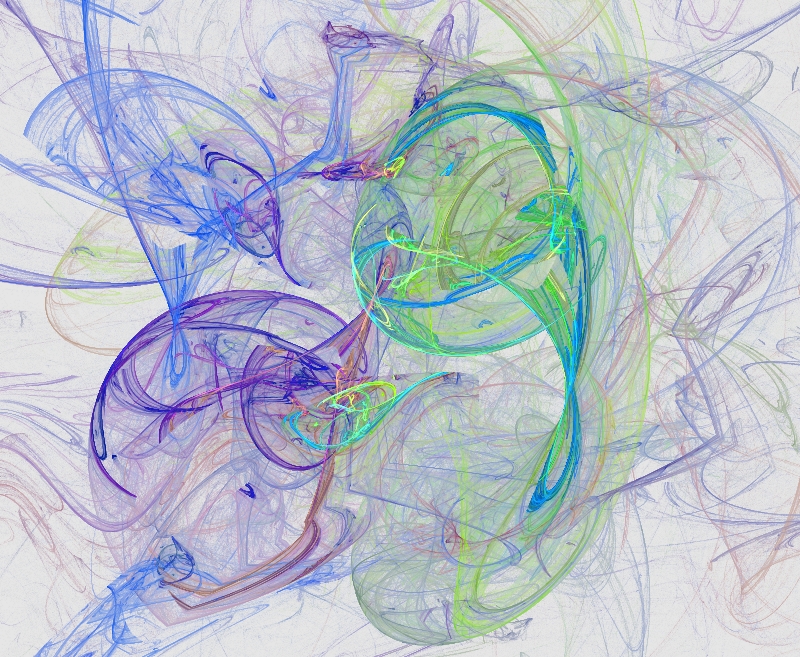 :
:
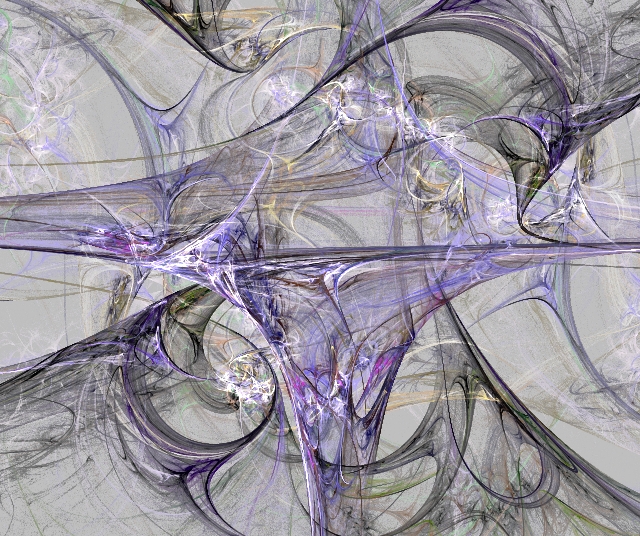 :
:
「数式CG」のページは こちらにあります。
マンデルブロ集合のズームアップ動画は こちらにあります。
     |